TX Text Control .NET Server for ASP.NET can be used to create powerful document processing Web APIs in ASP.NET Core Web Applications. This tutorial shows how to deploy these applications to Docker.
Creating the Application
Create a new ASP.NET Core Web Application by following this tutorial in our documentation:
After following these tutorial steps, you will have an MVC project framework that can utilize TX Text Control to create documents.
Adding a Web API
In the next step, a simple Web API endpoint is created that converts HTML input to PDF and returns a PDF document.
In the Solution Explorer, right-click Controllers and choose Add -> Controller from the context menu. In the opened dialog, select API Controller - Empty and confirm with Add.
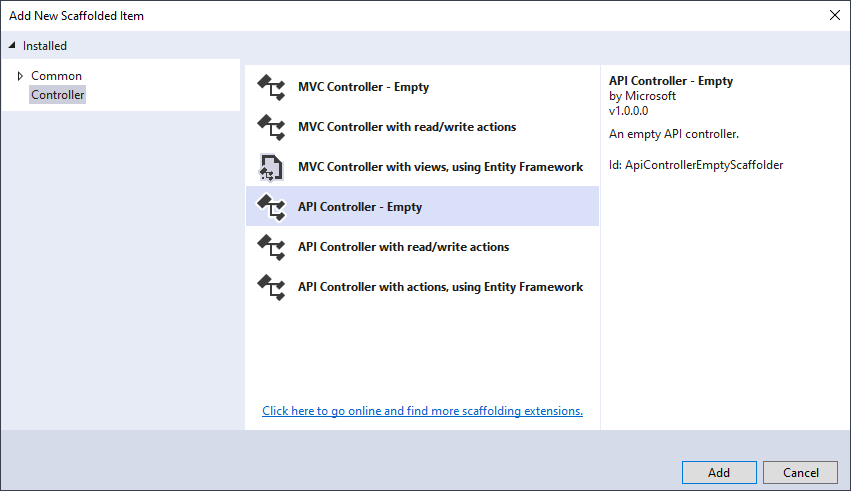
Name the controller DocumentController and confirm with Add.
Add the following code to the newly created controller:
[Route("api/[controller]")] [ApiController] public class DocumentController : ControllerBase { [HttpGet] [Route("CreatePdf")] public ActionResult<string> CreatePdf(string Html) { using (TXTextControl.ServerTextControl tx = new TXTextControl.ServerTextControl()) { byte[] data; tx.Create(); // load the Html content tx.Load(Html, TXTextControl.StringStreamType.HTMLFormat); // save the document as PDF tx.Save(out data, TXTextControl.BinaryStreamType.AdobePDF); return Convert.ToBase64String(data); // return PDF as base64 string } } } Start the application and navigate to the endpoint directly to test the functionality. Navigate to (replace the port number with the port number of your application):
https://localhost:5001/api/document/createpdf?Html=Test
It should return a long base64 encoded string which is essentially a PDF with the word Test. If you see a long base64 encoded string, the Web API works.
Creating the Dockerfile
A Docker container image is a lightweight, standalone, executable package of software that includes everything needed to run an application: code, runtime, system tools, system libraries and settings.
A Docker image is created automatically based on a Dockerfile by reading the instructions. The following steps are required to prepare a build process:
Create a new folder named docker-test that contains the following sub-folders and files:
- Folder named app
- A text file named Dockerfile (no extension)
In Visual Studio with the application opened that should be deployed, right-click the project in the Solution Explorer and choose Publish.
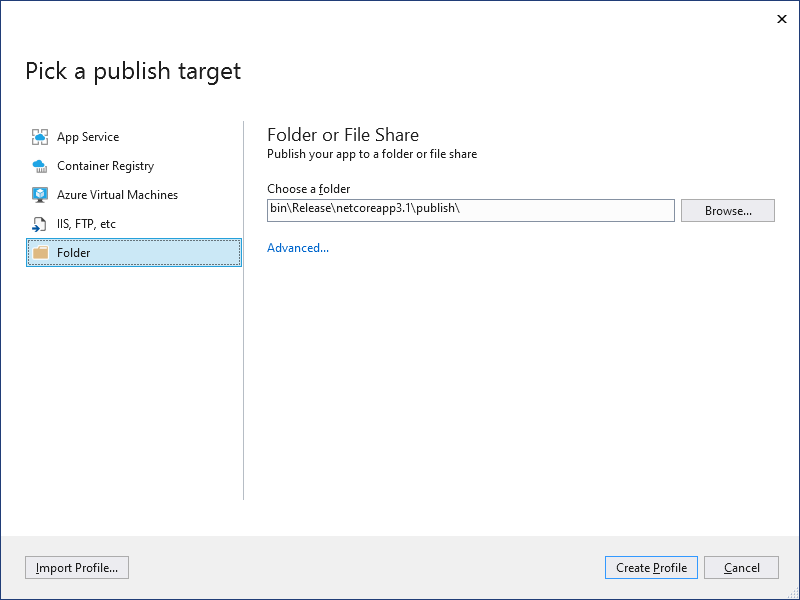
In the opened page Publish, click the Start button to open the Pick a publish target dialog. Select Folder as the target:
Click the Advanced... link to open the AdvancedSettings dialog. Make sure to select Framework-Dependent as the Deployment Mode and win-x64 as the Target Runtime:
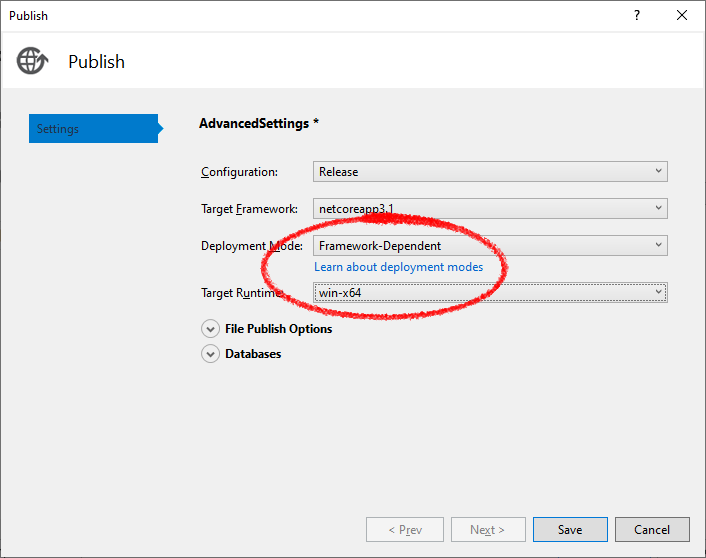
Confirm with Save. Close the Pick a publish target dialog by clicking the Create Profile button.
Click Publish to publish your application. Note the location of the publish folder or click the
 icon to copy the path to the clipboard.
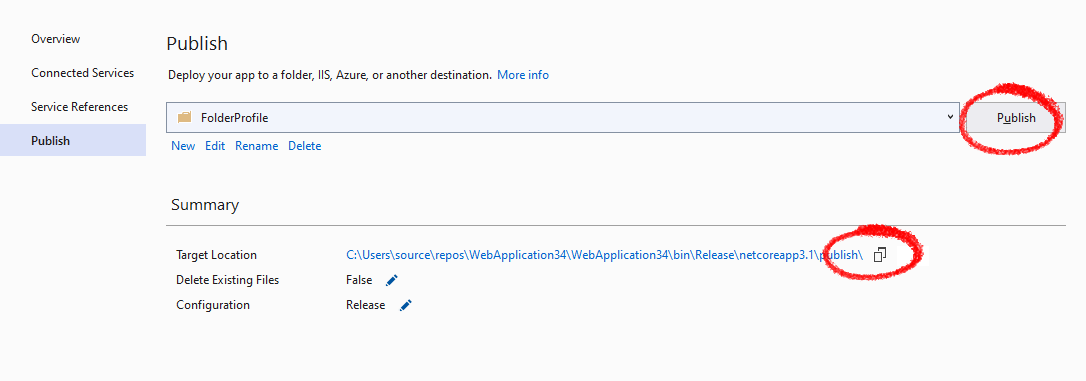
Copy the content of the publish folder to the newly created app folder from step 1.
Open the Dockerfile in a text editor such as Visual Studio Code. The Dockerfile script creates a Windows Server container with all requirements including .NET Core run-times and Visual C++ Redistributables.
There are two ways to deploy the application in Docker:
- Using IIS
- Without IIS
Continue this tutorial with the desired approach.
Using IIS
Copy the following code to your Dockerfile:
# https://hub.docker.com/_/microsoft-windows-servercore # "ltsc2016" to get fonts installed # Server Core 2019 is shipped without fonts FROM mcr.microsoft.com/windows/servercore:ltsc2016 # Copy the application from folder "app" to "C:\app" on container machine COPY app/ /app SHELL ["powershell", "-Command", "$ErrorActionPreference = 'Stop'; $ProgressPreference = 'SilentlyContinue';"] # Install IIS RUN Enable-WindowsOptionalFeature -Online -FeatureName IIS-WebServerRole; \ Enable-WindowsOptionalFeature -Online -FeatureName IIS-WebServer; \ Enable-WindowsOptionalFeature -Online -FeatureName IIS-CommonHttpFeatures # Download and install Visual C++ Redistributable Packages for Visual Studio 2013 RUN Invoke-WebRequest -OutFile vc_redist.x64.exe https://download.microsoft.com/download/2/E/6/2E61CFA4-993B-4DD4-91DA-3737CD5CD6E3/vcredist_x64.exe; \ Start-Process "vc_redist.x64.exe" -ArgumentList "/passive" -wait -Passthru; \ del vc_redist.x64.exe # Install ASP.NET Core Runtime # Checksum and direct link from: https://dotnet.microsoft.com/download/dotnet-core/thank-you/runtime-aspnetcore-3.1.5-windows-hosting-bundle-installer RUN Invoke-WebRequest -OutFile dotnet-hosting-3.1.0-win.exe https://download.visualstudio.microsoft.com/download/pr/fa3f472e-f47f-4ef5-8242-d3438dd59b42/9b2d9d4eecb33fe98060fd2a2cb01dcd/dotnet-hosting-3.1.0-win.exe; \ Start-Process "dotnet-hosting-3.1.0-win.exe" -ArgumentList "/passive" -wait -Passthru; \ Remove-Item -Force dotnet-hosting-3.1.0-win.exe # Create a new IIS ApplicationPool RUN [string]$appPoolName = 'myAppPool'; \ New-WebAppPool $appPoolName; \ Import-Module WebAdministration; \ $appPool = Get-Item IIS:\AppPools\$appPoolName; \ $appPool.managedRuntimeVersion = ''; \ $appPool | set-item RUN [string]$appPoolName = 'myAppPool'; \ [string]$appName = 'myDotnetCoreApp'; \ New-WebApplication -Name $appName -Site 'Default Web Site' -PhysicalPath C:\app -ApplicationPool $appPoolName Without IIS
Copy the following code to your Dockerfile:
# https://hub.docker.com/_/microsoft-windows-servercore # "ltsc2016" to get fonts installed # Server Core 2019 is shipped without fonts FROM mcr.microsoft.com/windows/servercore:ltsc2016 # Copy the application from folder "app" to "C:\app" on container machine COPY app/ /app SHELL ["powershell", "-Command", "$ErrorActionPreference = 'Stop'; $ProgressPreference = 'SilentlyContinue';"] # Download and install Visual C++ Redistributable Packages for Visual Studio 2013 RUN Invoke-WebRequest -OutFile vc_redist.x64.exe https://download.microsoft.com/download/2/E/6/2E61CFA4-993B-4DD4-91DA-3737CD5CD6E3/vcredist_x64.exe; \ Start-Process "vc_redist.x64.exe" -ArgumentList "/passive" -wait -Passthru; \ del vc_redist.x64.exe # Install ASP.NET Core Runtime # Checksum and direct link from: https://dotnet.microsoft.com/download/dotnet-core/thank-you/runtime-aspnetcore-3.1.5-windows-hosting-bundle-installer RUN Invoke-WebRequest -OutFile dotnet-hosting-3.1.0-win.exe https://download.visualstudio.microsoft.com/download/pr/fa3f472e-f47f-4ef5-8242-d3438dd59b42/9b2d9d4eecb33fe98060fd2a2cb01dcd/dotnet-hosting-3.1.0-win.exe; \ Start-Process "dotnet-hosting-3.1.0-win.exe" -ArgumentList "/passive" -wait -Passthru; \ Remove-Item -Force dotnet-hosting-3.1.0-win.exe WORKDIR /app EXPOSE 80 ENTRYPOINT ["dotnet", "myDotnetCoreApp.dll"]
Creating the Docker Image
In order to create the image, use the following commands:
Assume that you have installed Docker for Windows, open a PowerShell command window with explicit administrator rights and change to the directory where you created the folder docker-test.
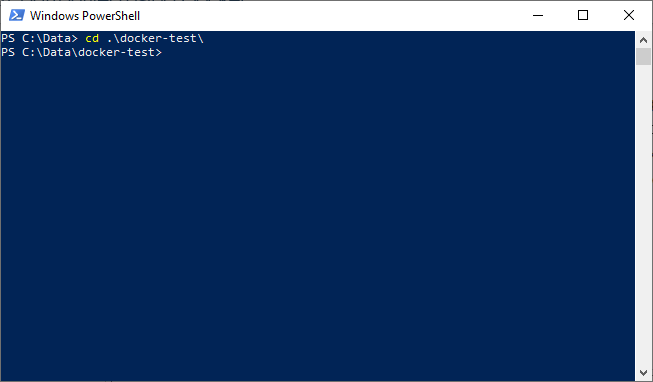
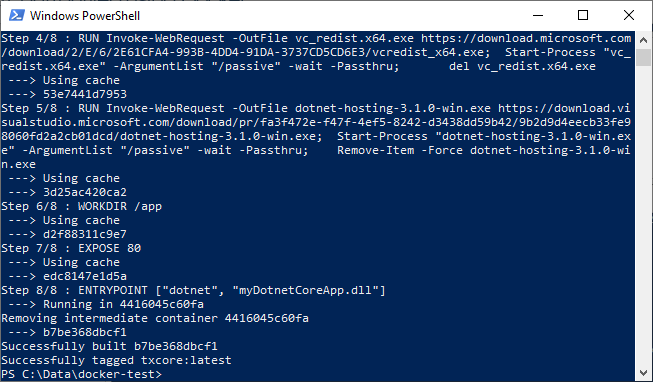
Type in the following command to build the Docker image based on the Dockerfile in the same directory:
docker build -t txcore .
Running the Docker Container
Depending on the Dockerfile you used in step 6, start the container with one of the following commands:
Using IIS
docker run -it --rm -p 5000:80 --name aspnetcore_sample txcore
Without IIS
docker run -it --rm -p 5000:80 -e ASPNETCORE_URLS=http://+:80 --name aspnetcore_sample txcore
In the Docker Dashboard, you can see the running container listening on port 5000:

Open a browser and navigate to http://localhost:5000 to see your deployed web application.
Related Posts
Using TXTextControl.Web in ASP.NET Core Razor Pages
by Bjoern Meyer June 10, 2020By default, TXTextControl.Web is built for ASP.NET Core MVC Web Applications. But it can be used with Razor Pages as well by adding the required static files to page level.
Building a Spell Checking Web API in ASP.NET Core
by Bjoern Meyer May 15, 2020TX Spell .NET provides a fully-featured spell checking interface and integration when used with TX Text Control editors. But it can be used without a UI as a spell checking engine as well. This sample shows how to create a spell checking Web API in ASP.NET Core.
No comments:
Post a Comment