Introduction
In the previous article, we saw how to integrate an Angular application with Azure DevOps so that we are continuously building our project, and publishing the output(s) as artifacts, attached to the build pipeline.
In this article, we'll be creating a Release Pipeline to automatically deploy to an Azure App Service whenever such an artifact was published.
Creating the Release Pipeline
We'll be creating the release pipeline in the same project as the build pipeline for which we want to deploy the artifacts.
Navigate to releases from the project's sidebar, and select New pipeline.
As we are going to make use of an Azure App Service to host our Angular application, select the Azure App Service deployment template, and click apply:

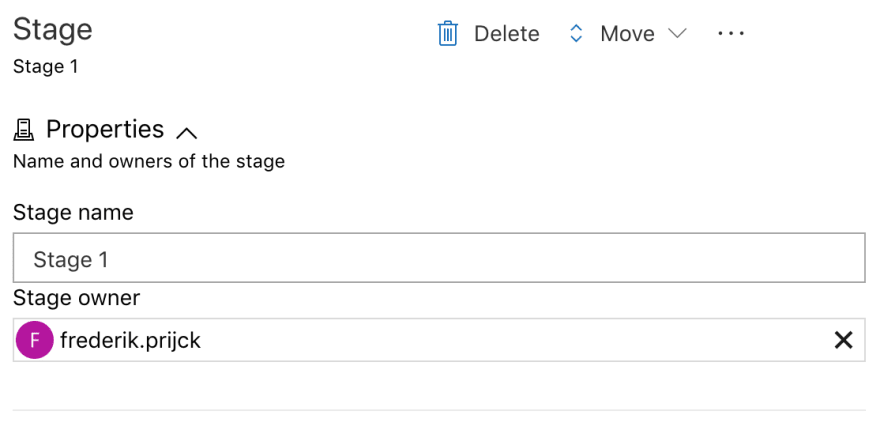
Azure DevOps supports multiple stages in a single Release pipeline (e.g. Development, Testing, Production environments). For this article, we'll only be using one stage, which is already created by default, using the name Stage 1. If you want you can give it an appropriate name, or keep it as is.
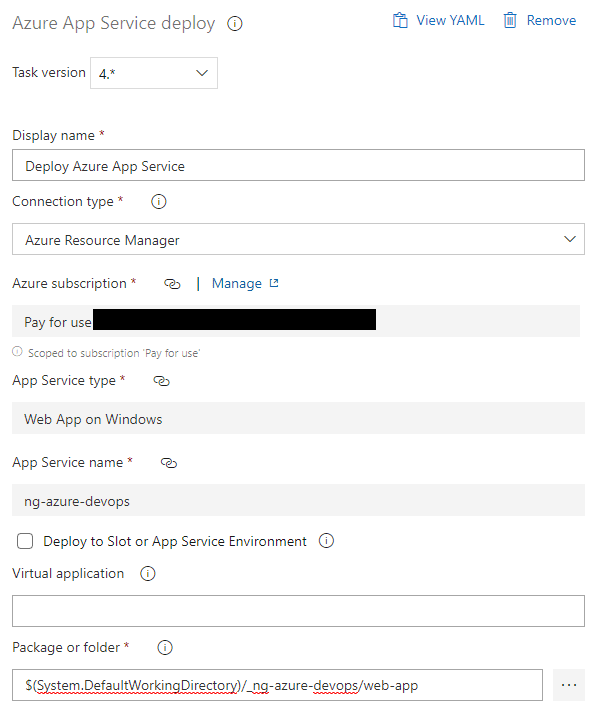
When selecting the Azure App Service deployment template, a task is automatically added to the Release pipeline. Head over to Tasks section, and fill in the required information. We'll need to select the Azure subscription. (Here is how you can create one if you don't have it yet. Make sure you chose Free Trial subscription to not be charged. Free Trial shouldn't be used for production) on which the App Service is running.
If this is the first time you're connecting Azure DevOps to your Azure account, you will need to click Authorize. Once we've authorized Azure DevOps to communicate with our Azure Subscription, we can select the App Service that will host our application (make sure you've selected value from the dropdown, and not just typed it manually):

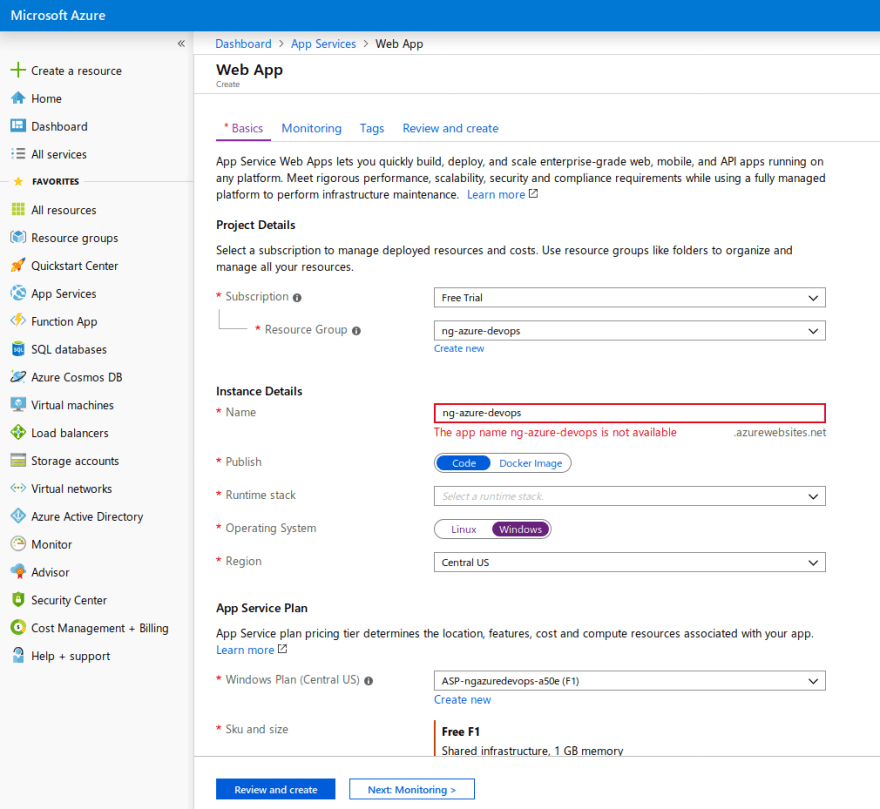
If you don't have the App Service created on the Azure Portal, you need to open Azure Portal Dashboard, and find App Service button on the left. Then, select it, and click the Add button. Here what you should see:
Adding build artifacts
Now that we've configured the destination environment for our deployment task, go to the Pipeline section (to the left of the Tasks section) to add the artifact we want to deploy. Click Add Artifact, select the Build source type (as the artifacts are stored within the build pipeline), and select the appropriate build pipeline from the source dropdown. You can keep the default values for both the version to deploy, as we always want to deploy the latest version, and the source alias. The source alias is the folder that will be used to download the artifacts. We will be using this value throughout the next steps when manipulating, and uploading the artifacts.

This will make all artifacts that belong to the build pipeline available in the release pipeline. They will be downloaded automatically when the release pipeline is triggered.
Now that we have both the artifacts, and the environment configured, we'll need to make one extra change to our deployment. For the Deploy Azure App Service task, we will need to specify which artifact it has to deploy.
Our Build pipeline publishes two artifacts:
- Code Coverage report
- The
ng buildbuild output which we want to deploy
If needed, we could add an extra step to deploy the code coverage artifact, but for this article, we're only going to deploy the ng build output, which is being published as an artifact with the name web-app, and made available in our Azure App Service deployment step inside the _ng-azure-devops directory (which is the source alias that was configured when adding the artifacts).
Now go to Tasks tab in our pipeline, click on deployment task, and change the Package or Folder to $(System.DefaultWorkingDirectory)/_ng-azure-devops/web-app.
Continuous deployment trigger
Even though we could save the configuration, and create manual releases at this point, in order to continuously deploy our artifacts, we'll need to set up a trigger. Click on the lightning strike symbol that's showing up on your artifact in the pipeline section, enable the Continuous deployment trigger, and add a branch filter for the branch you want to deploy (which is master in this case). We don't need the Pull request trigger for this article.

Save the changes for your release pipeline, and trigger a new build (by either making a code change or by manually queuing it from the build pipelines.
Once the build and release pipelines are completed successfully, you should be able to navigate to the App Service's URL, and see the default Angular project.

Environment specific configuration
When deploying our application, we might need some configuration that can be different for every environment that's hosting our application. As often frontend applications need to communicate with a backend, we'll be making the API URL configurable so that it can differ for each environment.
Angular environments
Angular has a built-in environment system that allows you to specify multiple environment configurations. When building the application with a given target environment, Angular CLI will replace the environment.ts file with the content of the environment-specific environment file (e.g. environment.prod.ts)
Even though this works quite well, the downside of this is that we need to recompile and reupload the artifacts for each environment to which we are planning on deploying. However, the idea behind an Azure DevOps release pipeline is to only build the artifacts once, while still being able to deploy them to, theoretically, an endless amount of environments.
Runtime environment configuration
As we need to be able to deploy our application to multiple environments using a different configuration, we will need a way to swap out environment configuration after the artifacts were built.
A typical way to do this in an Angular application is by including a config.json file in the assets directory that contains the configuration. Putting it in the assets directory ensures it's being copied to the dist folder when running ng build.
{
    "apiUrl": "http://localhost"
}
We can load the config file as part of an APP_INITIALIZER, ensuring the application isn't started before the config file is loaded.
@Injectable({
  providedIn: 'root'
})
export class ConfigService {
  config: Config;

  constructor(private http: HttpClient) {}

  loadConfig() {
    return this.http
      .get<Config>('./assets/config.json')
      .toPromise()
      .then(config => {
        this.config = config;
      });
  }
}
export const configFactory = (configService: ConfigService) => {
  return () => configService.loadConfig();
};

@NgModule({
  ...
  providers: [
    {
      provide: APP_INITIALIZER,
      useFactory: configFactory,
      deps: [ConfigService],
      multi: true
    }
   ],
   ...
})
export class AppModule { }
Wherever we need access to the environment-specific configuration, we can inject the ConfigService to use the config property.
@Component({
  selector: 'app-root',
  templateUrl: './app.component.html',
  styleUrls: ['./app.component.css']
})
export class AppComponent {
  title = 'ng-azure-devops';

  constructor(configService: ConfigService) {
    console.log('config', configService.config);
  }
}
In the above component, we're injecting the ConfigService in order to log the entire config object to the console. This should allow us to inspect whether or not the configuration has been set correctly for our environment. In a real application, you probably need to inject the config in your services that are responsible for calling that environment-specific API.
We don't need to add a separate config file for each environment to which we're deploying. Instead, we'll use a single file, and update its content as part of the release pipeline. This allows for a separation between your code-base, and the different amount of environments it's being deployed to.
Adjust tests, and make sure they pass. Then commit, and push the changes to the repository.
Modifying config.json on Azure DevOps
We'll need to modify the contents of config.json as part of a task in the release pipeline, move over to the release pipeline, edit it, and add a File transform task before deploying our application.
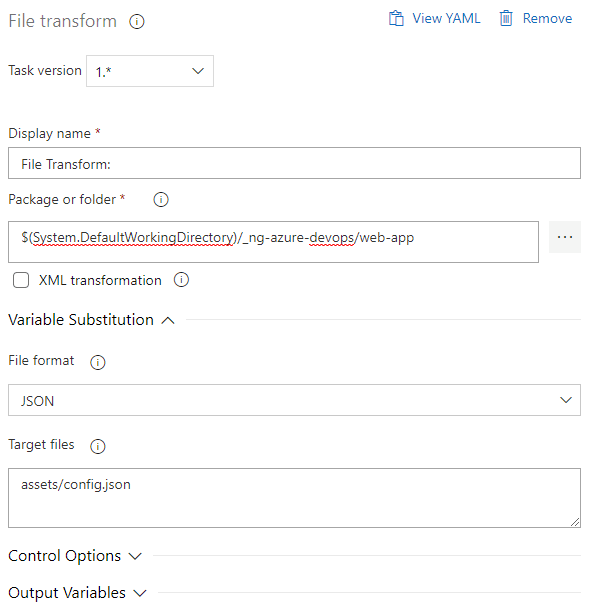
There are three important parts of this task that we need to configure:
- Package or folder: points to the correct artifact for which we want to transform a file
- File format: Azure DevOps' File Transform task supports both XML and JSON. We'll be using JSON for this article.
- Target files: Include the path to the config.json file, relative to the root of your artifact.
That's all we need to do in order for the File Transform task to start processing the config.json file prior to deploying it.
In order to define what names and values it should use while transforming the config file, we will need to create variables as part of the release pipeline. The file transform task will try and find all variable's names, and update its value accordingly.
For this article, all we need is an apiUrl variable with a value different from what we have locally (I went with localhost locally and thisdot.co for the environment):

If you have a more complex configuration object, using nested paths, you need to specify them using a JSONPath expression, see https://docs.microsoft.com/en-us/azure/devops/pipelines/tasks/utility/file-transform?view=azure-devops for more information on the file transform task.
Enabling JSON files on Azure
An Azure App Service doesn't allow JSON files to be served by default. In order to do so, we need to add a web.config file (more info on configuring system.webServer can be found at https://docs.microsoft.com/en-us/iis/configuration/system.webserver/).
<?xml version="1.0" encoding="utf-8"?>
<configuration>
    <system.webServer>
        <staticContent>
            <remove fileExtension=".json" />
            <mimeMap fileExtension=".json" mimeType="application/json" />
        </staticContent>
    </system.webServer>
</configuration>
We could add this config file to our git repository, and ensure it's also copied to the dist folder when running ng build. This get's a little complex if all we need is to enable JSON.
Luckily, we can also add a file as part of a release pipeline. As our web.config file will be very small, I'll be using this approach. This, again, keeps our source-code independent on where we'll be hosting it.
Move over to the release pipeline, and add a new task, either before or after transforming the config file. We do need to ensure this task is added before deploying the artifacts, so ensure it's executed before the deployment task.
The task for creating a file is not part of Azure DevOps itself. You can get it for free through the Marketplace: https://marketplace.visualstudio.com/items?itemName=eliostruyf.build-task
Once installed, edit the release pipeline, and add a new File Creator task, providing:
- file path: this is the path, including filename, for the file that's being created
- file content: Any content that should go in the created file.

Save the release pipeline, and create a new release (either by triggering a new build, or manually creating a release using the last known artifacts).
Once the release was completed successfully, navigating to the URL of the App Service should show the default Angular application as well as a console output showing the environment-specific configuration.

Conclusion
Azure DevOps makes setting up continuous deployment a breeze. In only a few steps, we have integrated an Angular application to automatically deploy our artifacts to one or more environments, providing each environment with the required environment-specific configuration.
This should take away a lot of time from manual deployments, allowing your team to focus on the quality of the software instead.
This article was written by Frederik Prijck who is a Software Engineer at This Dot.
You can follow him on Twitter at @frederikprijck .
Need JavaScript consulting, mentoring, or training help? Check out our list of services at This Dot Labs.


No comments:
Post a Comment