Important: Code works without any errors. Prety generic code . Build and publish to azure and use end points for any subscription in event grids .
This blog post demonstrates how to create a site using ASP.NET Core and SignalR for the purpose of viewing notifications from Azure Event Grid in near-real time.
All the source code, along with the ARM template, can be found at https://github.com/Azure-Samples/azure-event-grid-viewer.
Introduction
Recently, I came across this great article from Andrew Stanton-Nurse on how to get started with SignalR on ASP.NET Core 2.1.0. Around the same time, a colleague of mine was searching for an alternative to RequestBin to review notifications from Azure Event Grid. While these are two very different topics, they somehow came together when working on a current project.
The primary goal was to display notifications from Event Grid in near-real time. Using ASP.NET Core and SignalR, the site should refresh as messages are received, providing the user with the experience of a real-time feed. In addition, the payload of each event should be available for inspection, just like RequestBin.
The screenshot below shows the results of the experiment:

Let’s walk through how the site was built and the lessons learned along the way.
Setup
To get started, I’ll need the following:
- The latest .NET Core SDK (at this time, it’s 2.1.300-rc1).
- npm – to download the SignalR Javascript library.
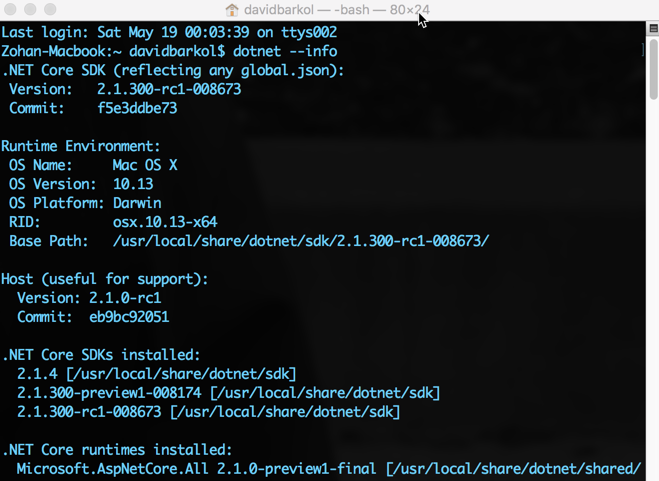
I’ll be using VS Code as an editor but that isn’t a requirement. The most important step is that the SDK is installed. To confirm the installation and other related information, we can execute the following command:
dotnet --info
This will return the version, along with additional information about the SDKs installed:
The client-side library is something that will be added later, for now we will proceed with creating the site.
Creating the ASP.NET Core Site
Let’s start by creating a new site. For this project, I am going with the MVC template:
dotnet new mvc --name viewer
We’ll use a Web API controller to subscribe to messages from Event Grid – that’s why the MVC template was chosen. More on that later.
Configuring SignalR on the Server
The next step is to create a class in our project for the SignalR hub which will be used to push messages to the connected clients. Since this will be a one-way broadcast (from the server to the clients), the class is empty. If we wanted bi-direction communication between the clients and the server, then we would provide methods here as well.
 by
by Next, in the Startup.cs file, we need to add SignalR support. This begins by registering the service with the collection so that it can become available via dependency injection throughout the project:
Lastly, within the same Startup class, we update the Configure method to include a route to the hub we just created (lines 6-9). This basically provides a route for the clients to connect to and ultimately, receive messages from the server.
Receiving Events on the Server
With the basic configuration in place on the server-side, we can now move our attention to handling incoming notifications from Event Grid. Let’s create a strongly-typed class that represents the structure of an event. We’ll designate the Data property as generic:
Next, we create the API controller that will serve as the endpoint for incoming notifications from Event Grid.
Under the Controllers folder, let’s create a new class that inherits from Controller called UpdatesController. We’ll update the constructor to take in an instance of the hub and save it into a private data member:
We’ll also add two more data members that will inspect some header values to determine if the request is either a notification or request to validate a subscription from Event Grid:
The last piece of the puzzle for the controller is to handle the post request that will be called by Event Grid. Within this method we will:
- Handle any validation requests by returning the validation code (lines 60-64).
- Iterate through each event and broadcast it to all the connected clients (lines 68-81).
The implementation for the entire class is as follows:
Perhaps the most interesting piece of the notification component is the portion that sends the messages to the connected clients. The first parameter is the name of the method to invoke on the clients: gridupdate. The other parameters are a collection of properties we want to include in the message:
Implementing the Client
With the server portion complete, let’s move to the UI and retrieve the JavaScript library for SignalR using NPM:
npm install @aspnet/signalrWe’ll copy the signalr.js file (or it’s minified version – signalr.min.js) under the wwwroot/lib folder of the project.
The markup will consist of a table to display the events (lines 1-8) and a Handlebars template (lines 10-28) for binding the data from the message to the UI:
Now to the part that bring this page to life: the JavaScript. Here is a breakdown of the remaining code:
- Include the script references for signalr, handlebars and a library that will help us display some JSON in a readable format (lines 2-6).
- Initialize the page by establishing a hub connection (lines 39-42).
- Handle incoming messages sent to ‘gridupdate’ (lines 45-47).
- Bind the data from the message to the UI using the handlesbars template (lines 17-30).
Note: jQuery, Bootstrap and other references are part of the generated shared layout (_Layout.cshtml) file that encapsulates this view.
Our coding is done. Let’s build the project and publish it locally. To build:
dotnet build
To publish the project to a local folder:
dotnet publish
We’ve written a good chuck of code to get this far. Let’s get this running on Azure!
Deploying to Azure
Prior to the RC1 release, we had to install the ASP.NET Core Runtime Extensions in order for this to run on an App Service – that is no longer a requirement. The only thing we need to configure on the server side will be to enable web sockets support from the application settings:

I’ve created a ARM template that will provision the App Service (with web sockets enabled) and deploy the code. You can kick it off from the GitHub repository: https://github.com/Azure-Samples/azure-event-grid-viewer.
Creating an Event Subscription
We’re in the final stretch – the site has been implemented and deployed onto an App Service in Azure. Our last step is to create an event subscription with Event Grid.
I happen to have a V2 storage account ready to test with but you can use any of the other event sources (even custom topics) for this exercise.
Under settings for the storage account, I will select Events:

From there, we can add a new event subscription:

And then fill out the details for the subscription:

The subscriber endpoint will be something like:
https://<your-appservice-name>.azurewebsites.net/api/updates
The api/updates portion is for the API controller we created earlier. All the updates from Event Grid will be sent to that address.
End to End Testing
The animation below demonstrates the site in action. On the right are files being uploaded to a container. After each file is successfully uploaded, a notification is sent from Event Grid to the site. The left side, shows the site contents update dynamically for each incoming event.

Summary
This was a fun project to put together. I always enjoy mashing up a bunch of technologies to create something new and unique – hopefully that is the case here.
Some key resources:


