Building CI/CD process for the .NET Core application could be complicated especially when you are dealing with Kubernetes and Docker and if you need to include code style analysis, unit test and code coverage report.
In this article I am going to explain the process of building simple CI/CD pipeline for existing .net core application to moving it to Azure Kubernetes Services using Azure DevOps. The final Pipeline will be easy to understand and reusable.
Deployment Architecture
Deployment process includes the following steps: fetching the code from Git Repository, building application, restoring NuGet packages, running unit test, building unit test and code coverage reports, pushing docker image to registry and deploying to AKS cluster.


Azure Kubernetes Cluster setup
I have used simple AKS cluster, with 3 nodes architecture that contains Ingress-nginx load balancer. You can also use Traefik.io, istio.io even Standard Azure Load Balancer.


Detailed description of how to setup AKS cluster including Ingress setup and deployment scripts can be found Here.
After deploying AKS, the main resource group it will look like in the image below.


Setup service connections
Before starting to configure the main pipeline steps the connection between Azure Container Registry(ACR) and Azure Kubernetes service needs to be granted by granting access of AKS service principal to ACR. RBAC service principal for Azure DevOps is created and everything is ready to push and pull docker images withing pipelines. Alternatively you can do it in Azure DevOps Service Connection which I will explain in the next session.
Here you can find the detail description how to configure connection between ACR and AKS.
Azure DevOps service connection with Azure Kubernetes Services and Azure Container Registry.
By Using Service Connection you can connect Azure DevOps to your, already deployed AKS cluster, Azure Container Registry, Docker Registry (Docker Hub) and many other services.

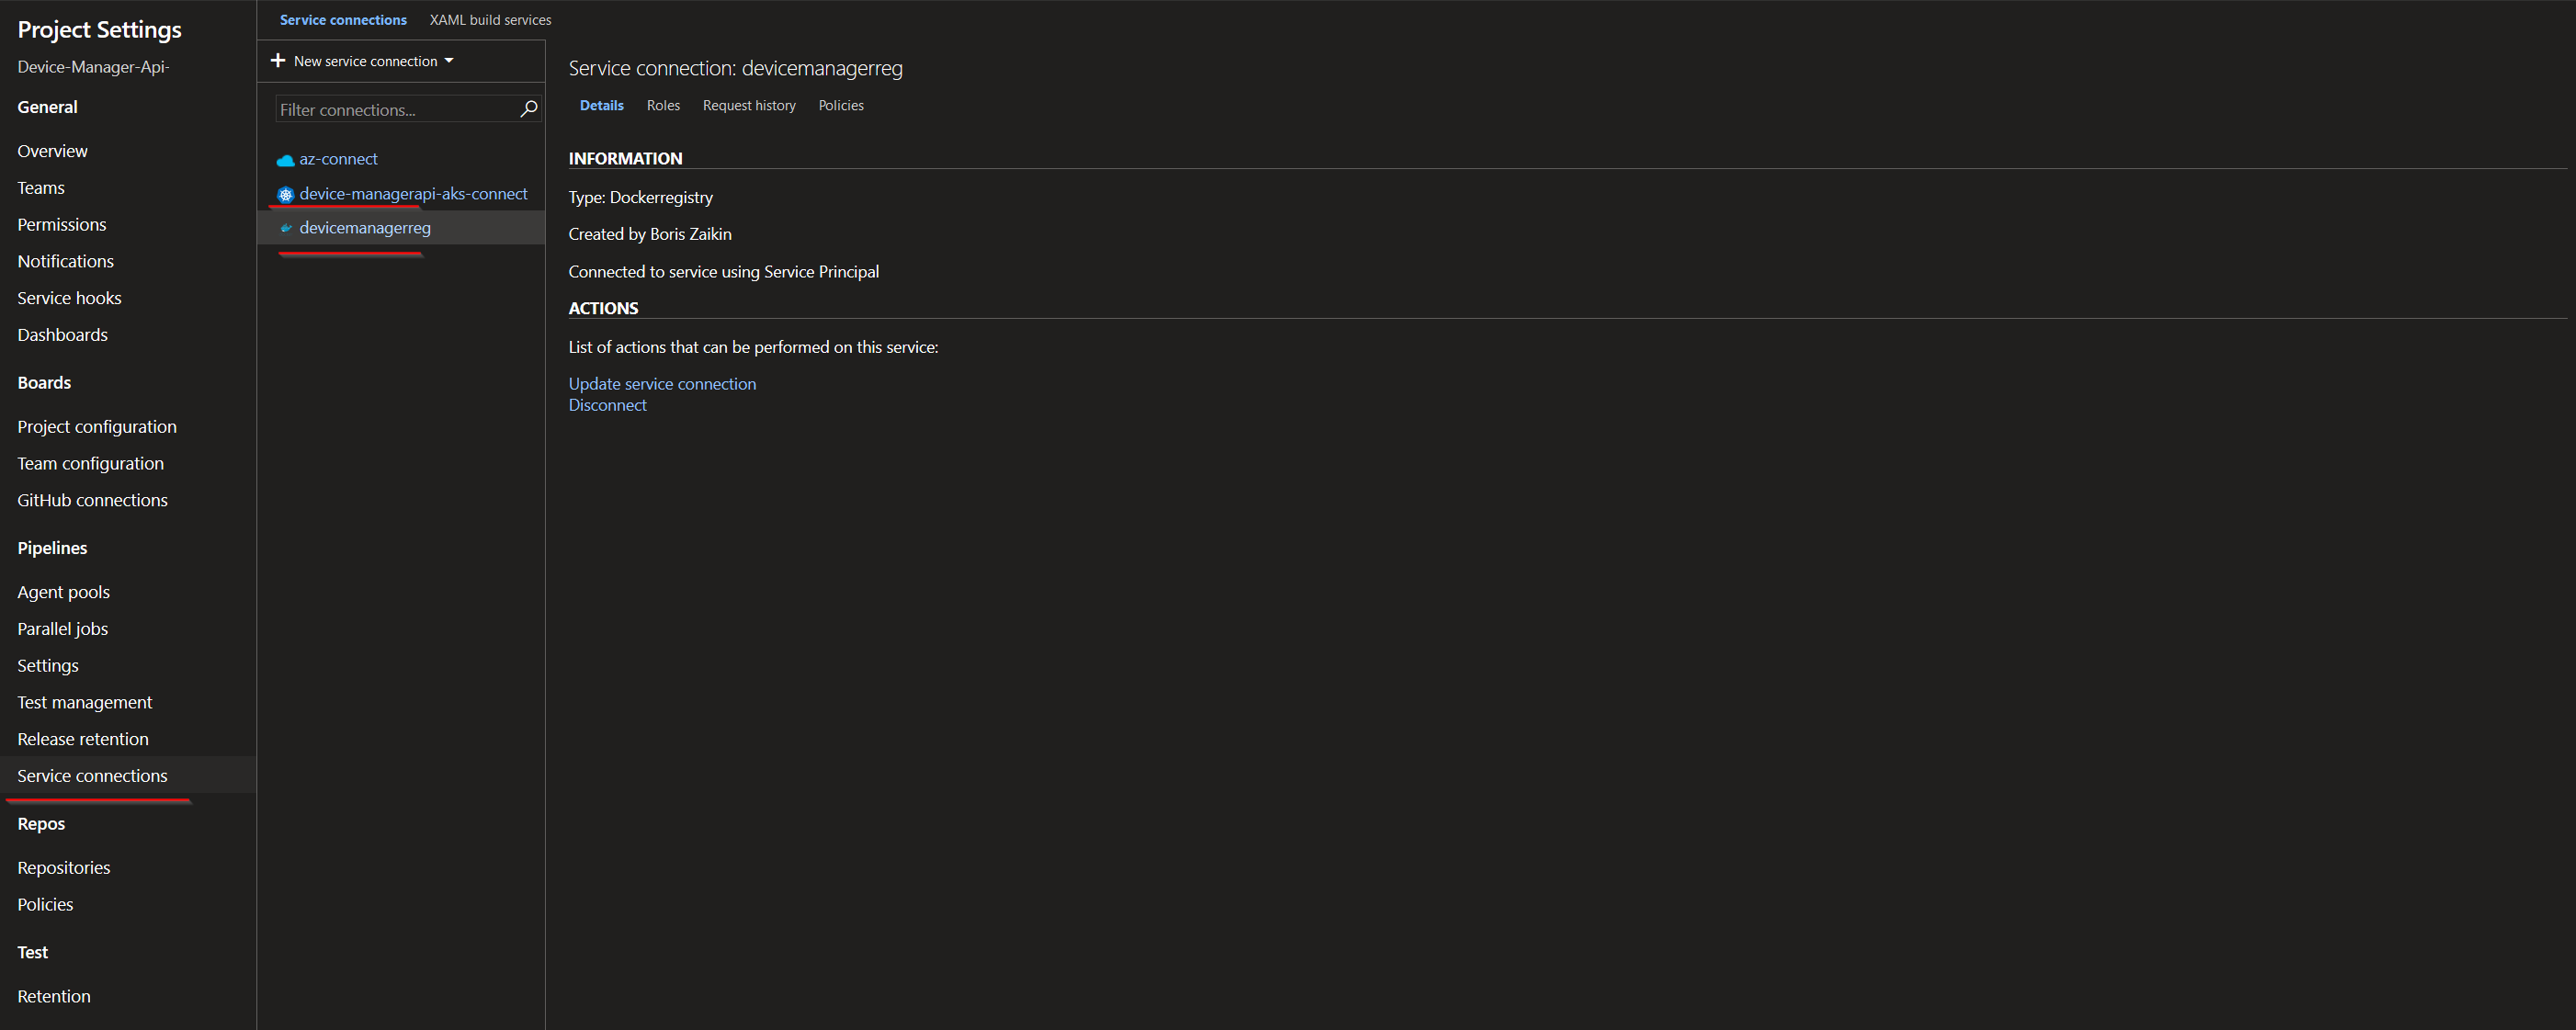
Creation of connection to ACR is quite easy, you just need to specify a connection name, a subscription and a registry name and that’s it.


You can connect (and authenticate) your AKS cluster using Kubeconfig, Service Account and Azure Subscription. In my project I used Kubeconfig, as one of the fast option, because you need just find kubeconfig JSON, copy it and choose your Cluster context.

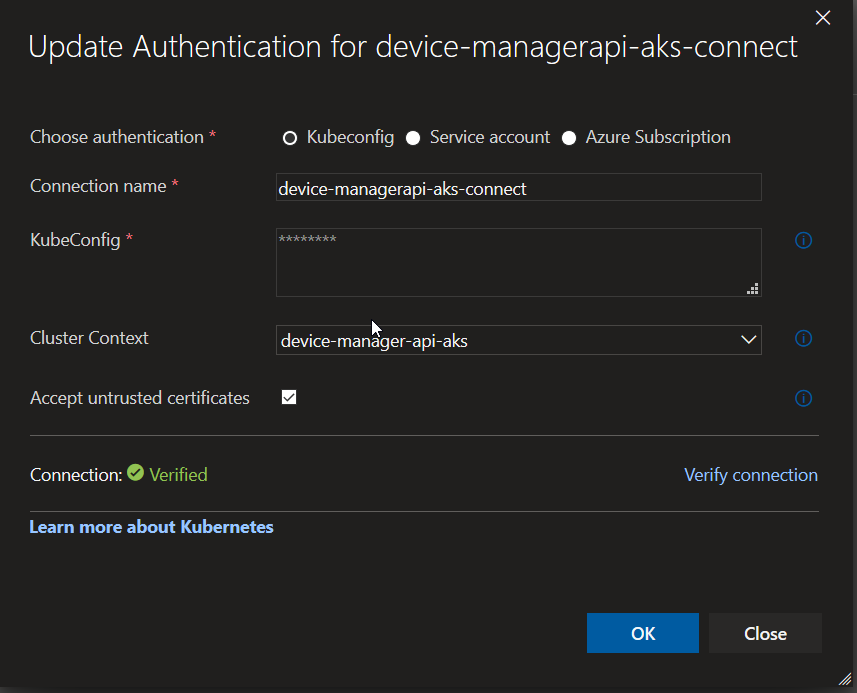
You can find KubeConfig it in the following directory (In the Windows): C:\Users\your_user_name\.kube\config Here is documentation how to find and work with KubeConfig also for Linux and Mac.
Pipeline steps
Finlay I’m moving to pipeline steps and the very first step is to use a script for restoring all NuGet dependencies/packages, building dot net core application, Running Unit Tests, building code coverage report. Also please notice that I use system variable $(Build.BuildNumber) as tag for the coverage report generation. At the end test results will be published as artifacts and Azure DevOps can build visualization analytics charts.
Below you can see Tests blade with statistic data and Test Results in the Tests section of the Azure DevOps


Step 2 - Code coverage results
The next step is to publish code coverage results to DefaultWorkingDirectory. The whole process is based on Cubertura Report Generator, a .Net core library.
The first statistic results are already available:


The detailed file by file report you can find on Code Coverage tab. This report is based on generated xml reports.


Step 3 and 4 — Building Container and Pushing it to the ACR
After the previous steps have been completed the project is to be put into a container. For this I am going to use version 1 Docker step. You need to specify a path to a Docker file like I did it here, provide image name, for example, boriszn/devicemanagerapi and tag — 1.102.1., and the last step is to specify a container registry, for example, devicemanagerreg.azurecr.io.
For a tag creation I used semantic versioning and hard-coded some version numbers to simplify the Pipeline, however you can also use different approaches to build the a tag, for example using variables which are required to run a pipeline or take then from git version.
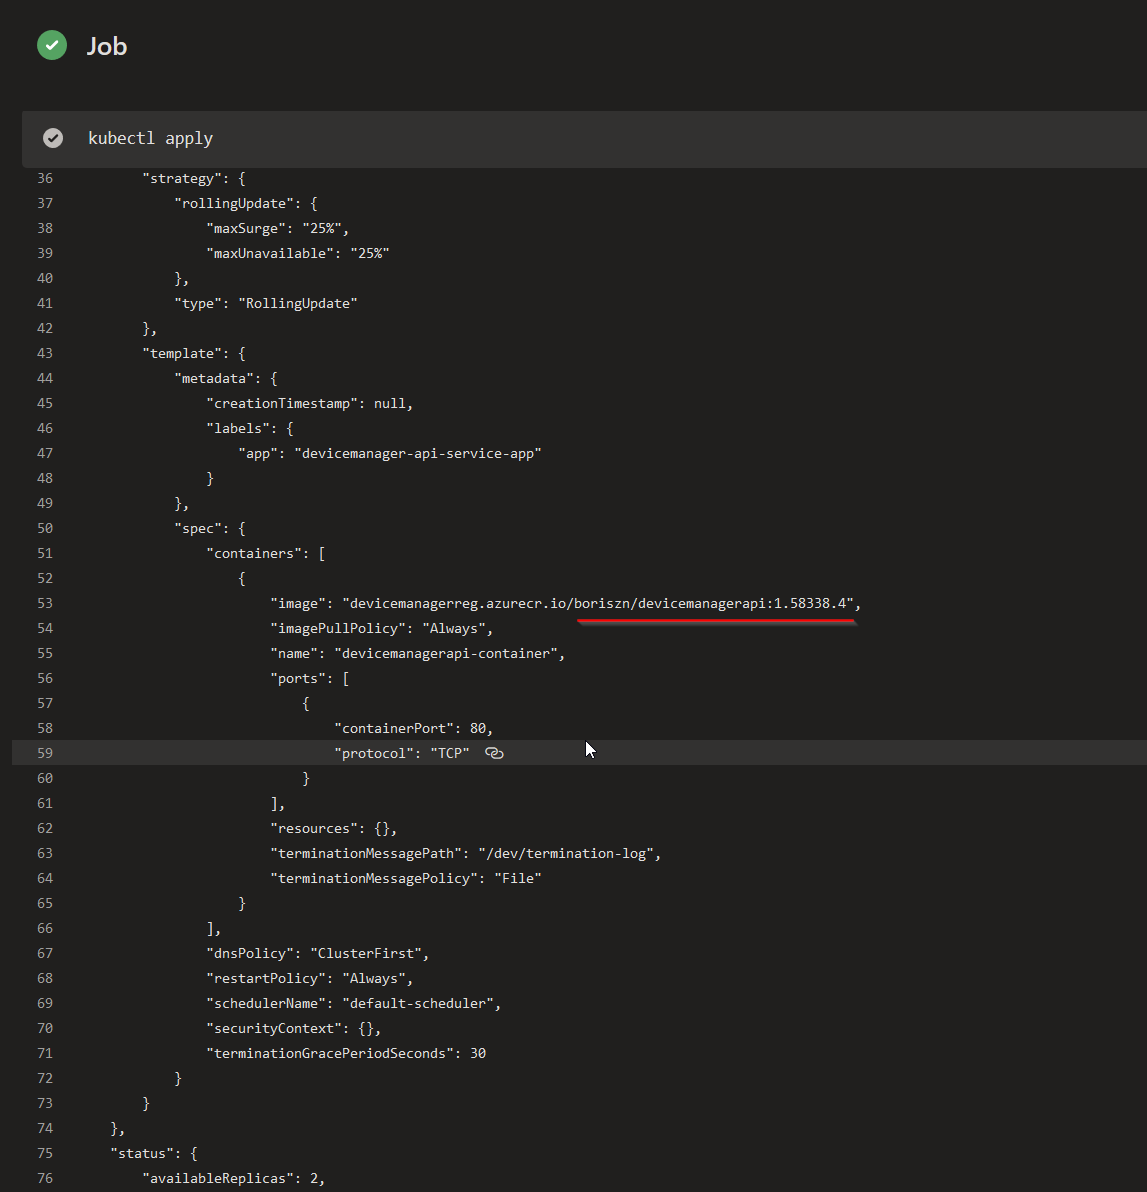
The next step is to push our dockerised app to the Azure Container Registry. Here I specified command and image to push. You should take into account that I pushed 2 images with the first image tag 1.58338.4 and the second one is tag: latest.


AKS deployment steps
For Azure Kubernetes Deployment you need to replace a build number in AKS deployment yaml file and display it in Azure DevOps after successful execution.
After that run “Apply” command for AKS cluster.
Two important parameters here are a path to my cluster deployment YAML script (./deployment/aks-deployment.yaml) and a cluster name (device-manager-api-aks). Other parameters were explained in the previous sections.

That’s it! Below I’ve listed complete YAML pipeline that we configured in the previous few sections and that is easy to import to your Azure DevOps projects. If you have any questions reach out in the comments!


No comments:
Post a Comment