In this lab we will Create a new Azure DevOps project and populate the project repository with our application code, then we will crate a new build pipeline, install WhiteSource Bolt from the Azure DevOps Marketplace to make it available as a task and activate it. Finally then we will add WhiteSource Bolt as one of our build tasks and scan our project code for security vulnerabilities and licensing compliance issues and view the resultant report.
DevOps Course Source
This lab is used in the following courses.
- AZ-400T05: Implementing Application Infrastructure - Module 5 Compliance and Security. The lab compliments the AZ-400 series of courses to help you prepare for the AZ-400 Microsoft Azure DevOps Solutions certification exam.
Pre-requisites:
- An Azure subscriptions
- An Azure DevOps account
Lab Tasks:
- Create an Azure DevOps account and populate the project repository with our application code
- Create a Build pipeline
- Install WhiteSource Bolt from the Azure DevOps marketplace and activate it
- Add WhiteSource Bolt as a build task in our build pipeline
- Run our build pipeline and view WhiteSource security and compliance report
Estimated Lab Time:
- approx. 80 minutes
Task 1: Create and Configure Azure Devops environment
Our first task is to create an Azure DevOps project. To do this you will need an Azure DevOps account. If you have an existing Azure DevOps account you can use that and just create a new project, as outlined from step 3 below.
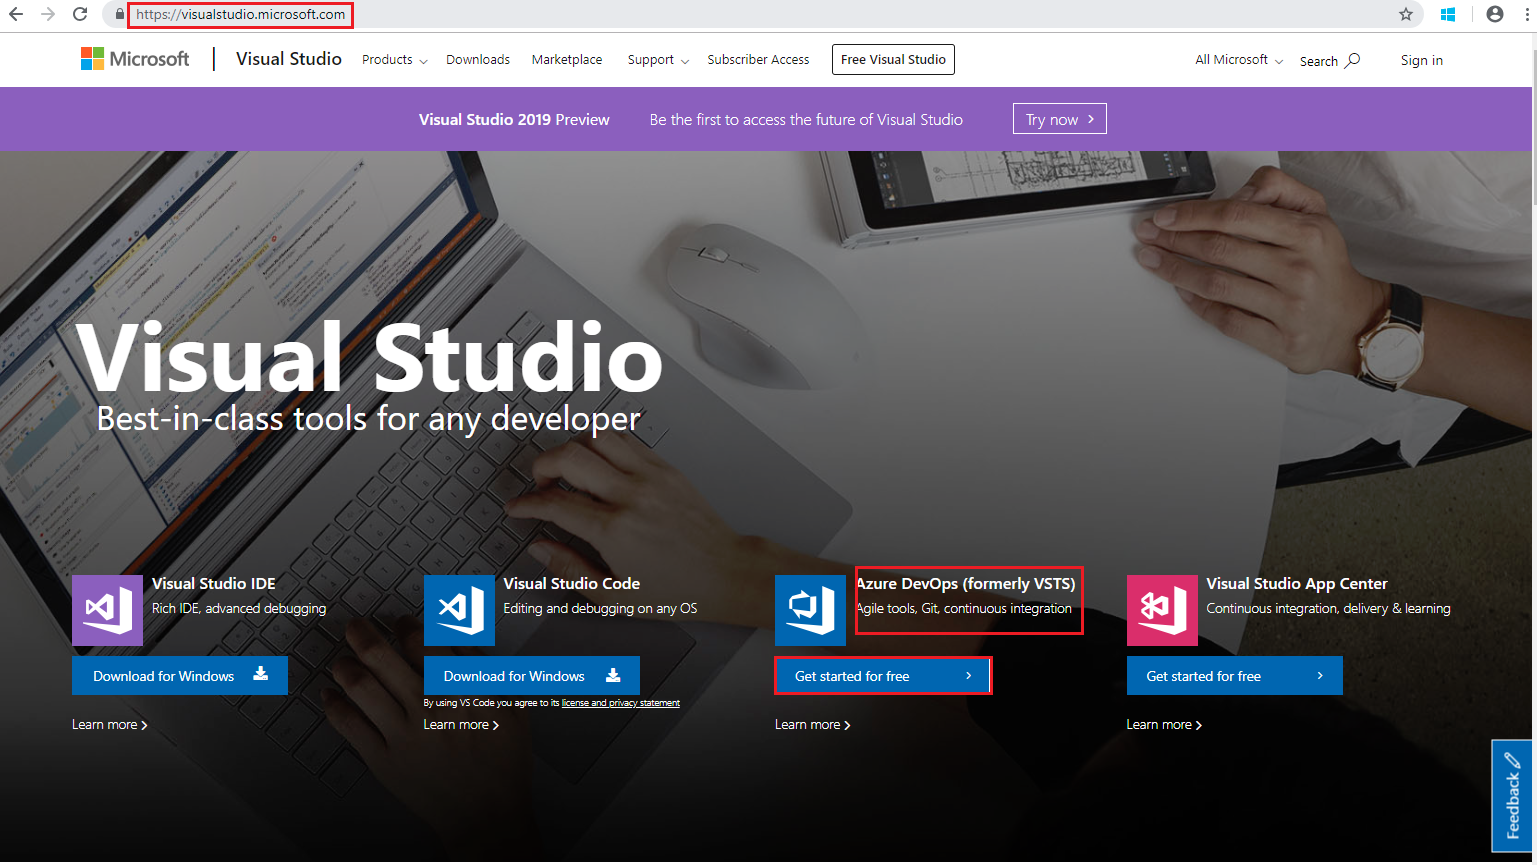
If you do not have an Azure DevOps (formerly known as Visual Studio Team Services (VSTS)) account, you can sign up for a free account by going to http://visualstudio.com. Then, under Azure DevOps (formerly VSTS) section click the Get Started for free link.
Sign in with your Microsoft account. If you do not have a Microsoft account, you can create one by clicking on No account? Create one! and following the steps complete the process to create your free Azure DevOps account.
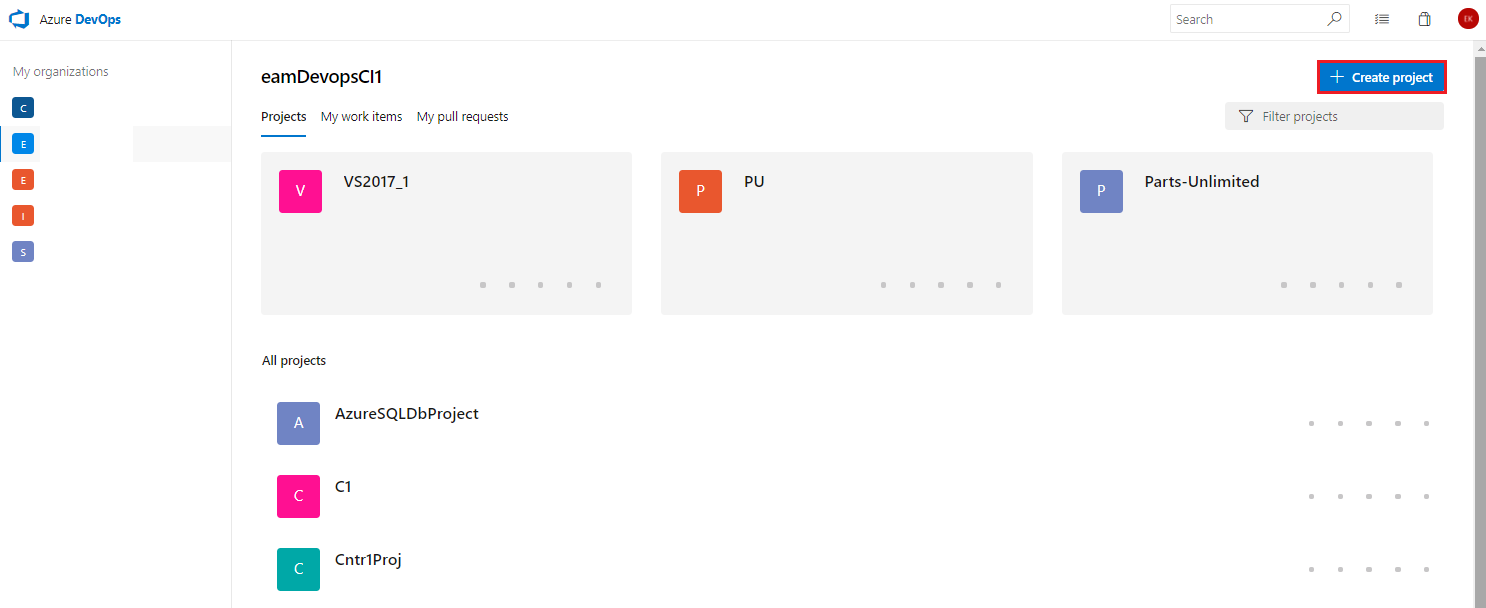
Go to http://visualstudio.com and in you Azure DevOps account click on the + Create project button.
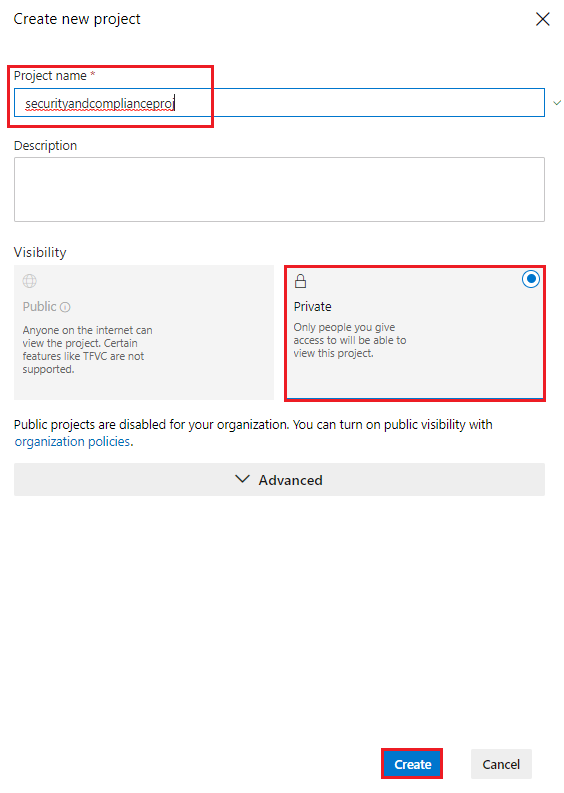
In the create new project dialogue and click Create
Project name: securityandcomplianceproj or any name you wish Visibility: Private
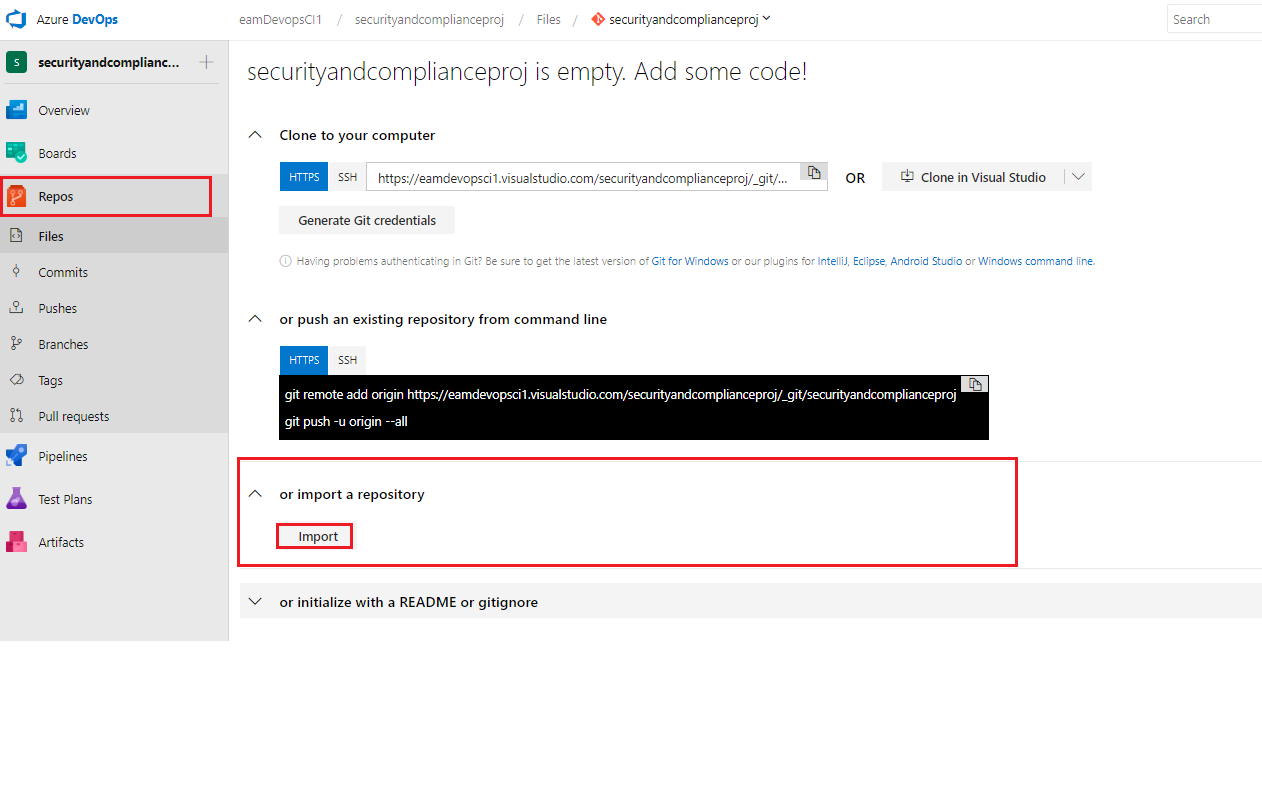
In your new project, go to Repos and under the section or import a repository click *Import
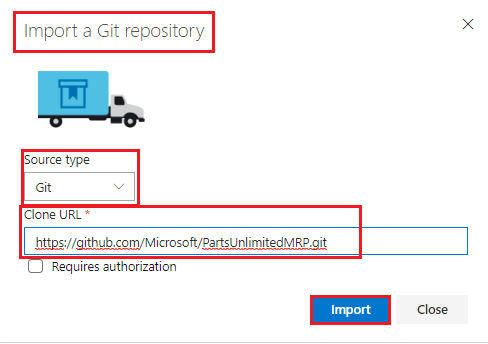
In the Import a Git repository dialogue select the below and click Import. We are using an existing repository that is available on GitHub at https://www.github.com/microsoft/partsunlimitedmrp
- Source type: Git
- Clone URL: https://github.com/Microsoft/PartsUnlimitedMRP.git
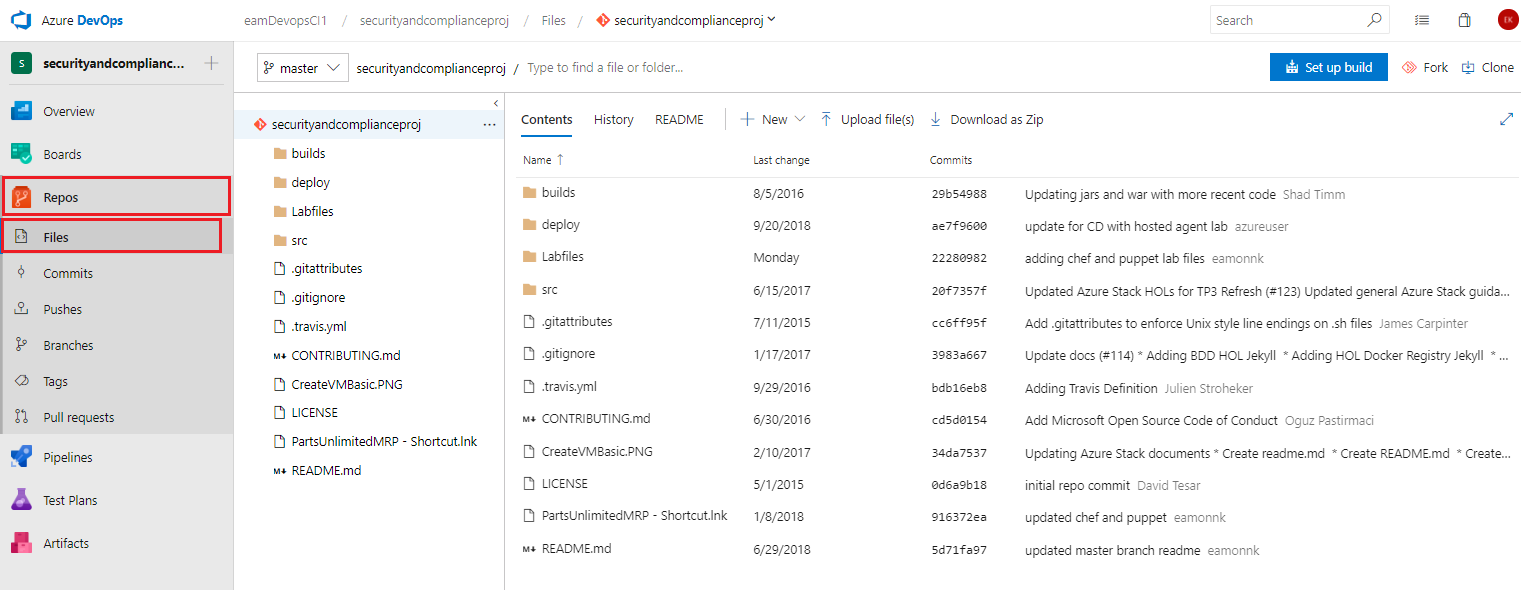
Once imported you should now see the files populated in your Azure DevOps repo.
Task 2: Create a Build pipeline
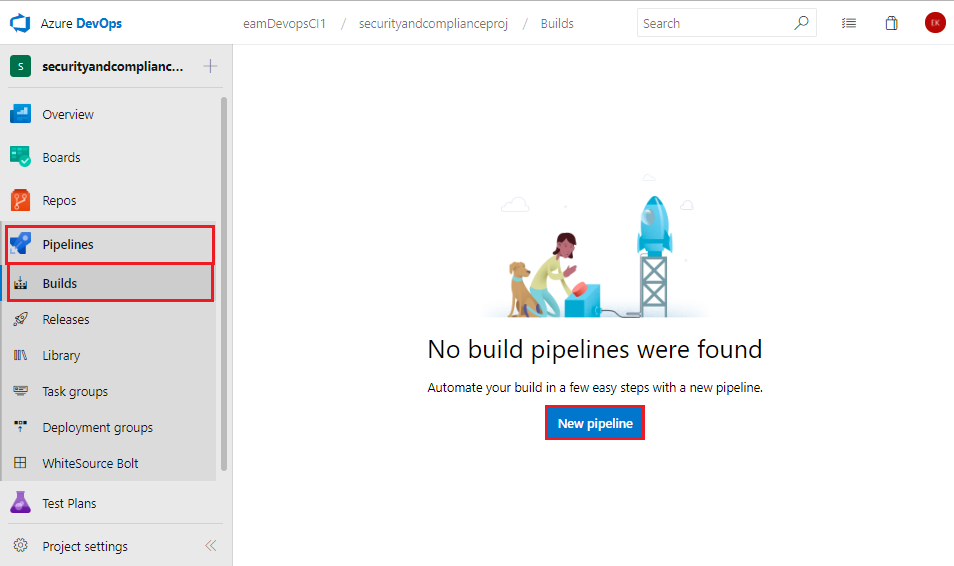
Go to Pipelines > Build and select New pipeline
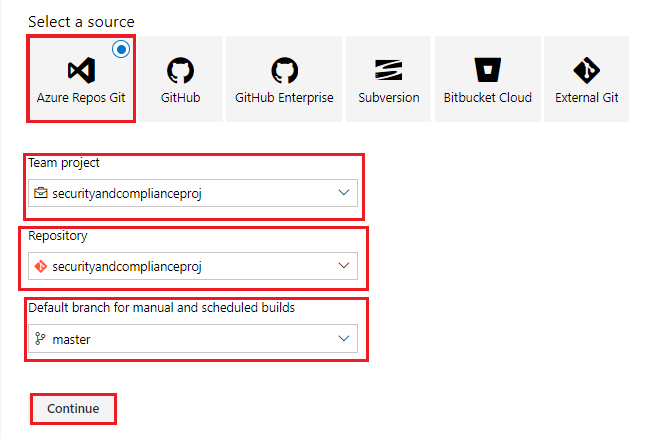
In the Select a source pane use the below values and click Continue
- Select a source: Azure Repos Git < this should be the default value >
- Repository: < whatever you called your azure devops project i.e. securityandcomplianceproj >
- Default branch for manual and scheduled builds: master
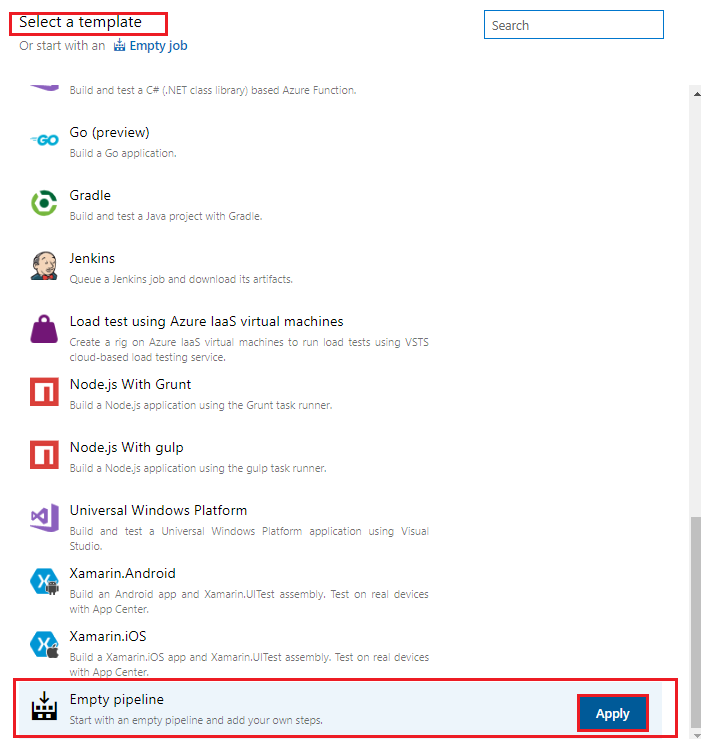
In the Select a template pane scroll down to the end of the list, choose Empty pipeline, and click Apply.
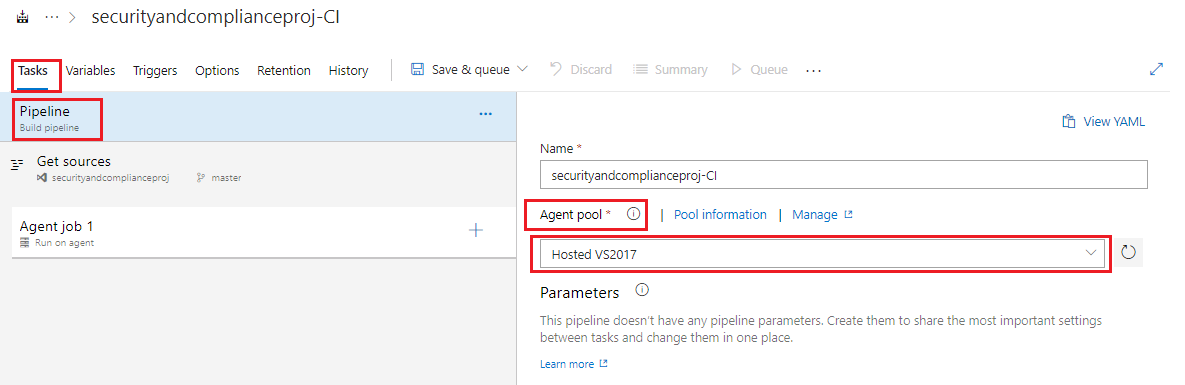
Under the Tasks tab and then Pipeline in the Agent pool drop down box select Hosted VS2017
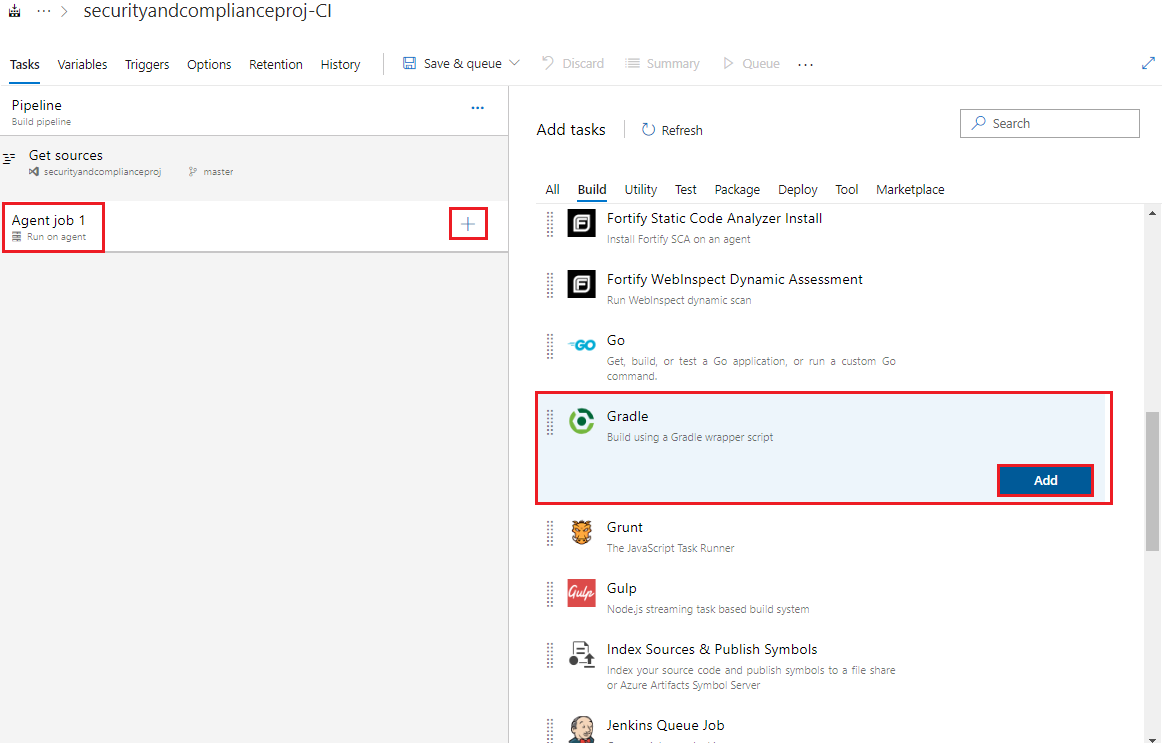
Click on the Agent job 1 section, click the + button to add a task, click on Build and scroll down to find the Gradle task. Then, click the Add button three times next to the Gradle task to add three Gradle tasks to the build pipeline. Gradle will be used to build the Integration Service, Order Service, and Clients components of the MRP app.
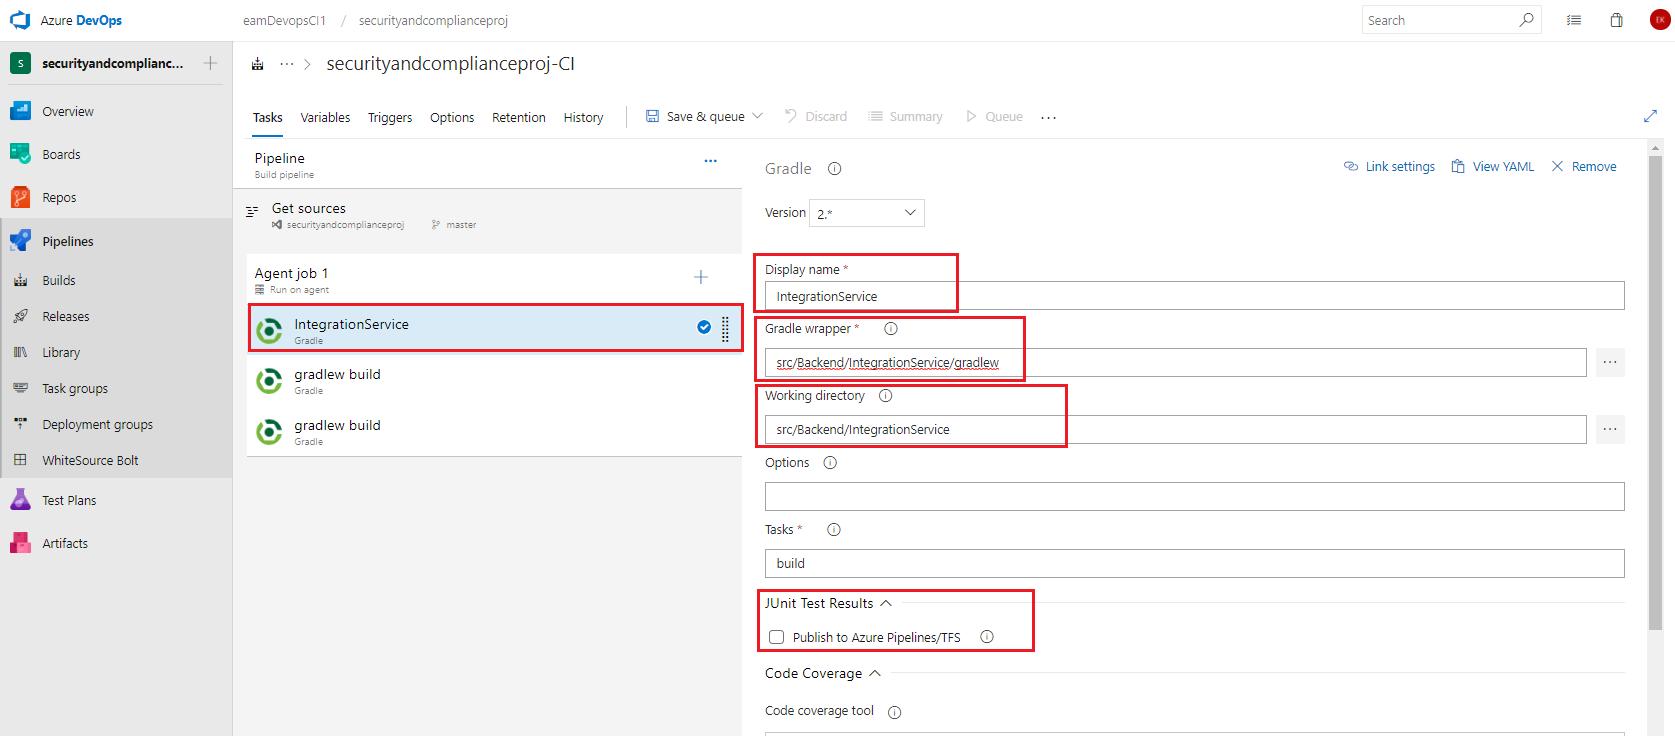
Select the first Gradle task and set the below values, leaving any items not mentioned as their default values.
- Display name: IntegrationService
- gradle wrapper: src/Backend/IntegrationService/gradlew (either type or browse using the … button)
- Working Directory: src/Backend/IntegrationService (either type or browse using the … button)
- JUnit Test Results: uncheck the checkbox to Publish to Azure Pipelines/TFS, since we will not be running automated tests in the Integration Service.
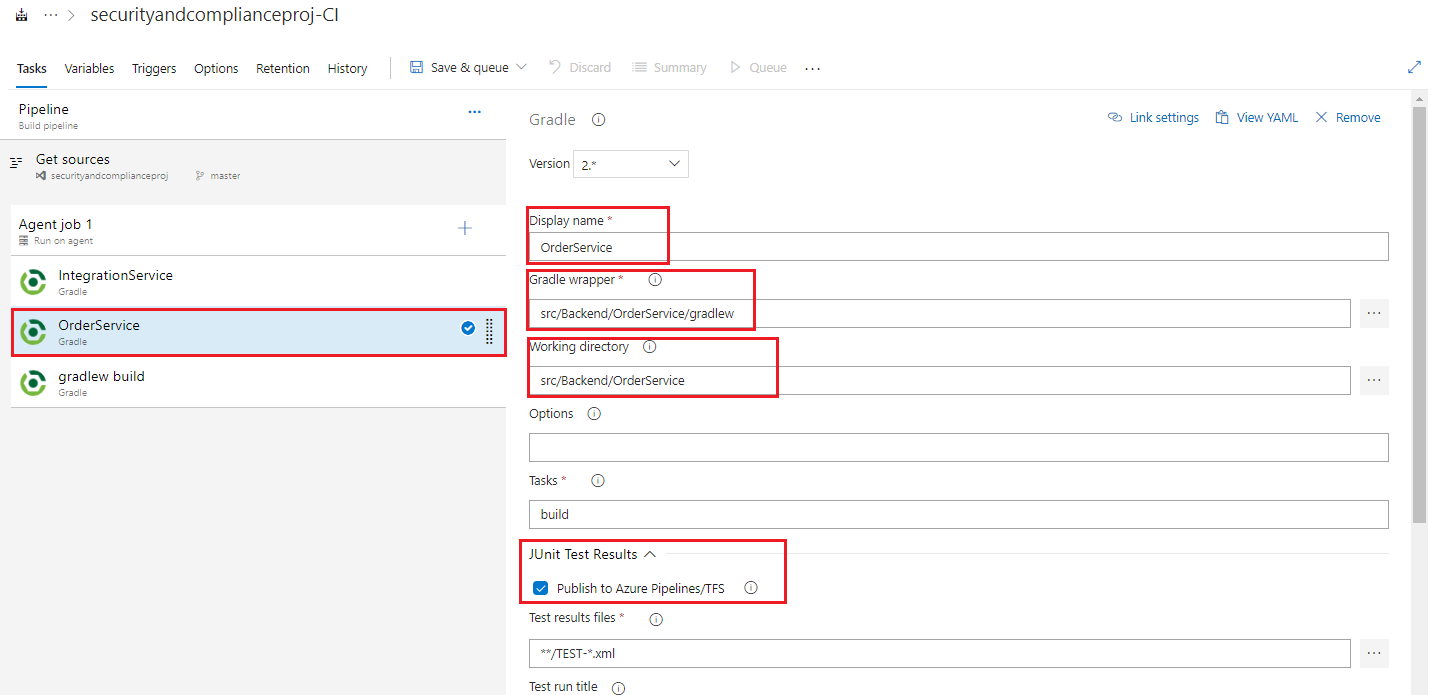
Select the first Gradle task and set the below values, leaving any items not mentioned as their default values.
- Display name: OrderService
- gradle wrapper: src/Backend/OrderService/gradlew (either type or browse using the … button)
- Working Directory: src/Backend/OrderService(either type or browse using the … button)
- JUnit Test Results: check the checkbox to Publish to Azure Pipelines/TFS , and set the Test Results Files field to
**/TEST-*.xml. Since the Order Service does have unit tests in the project, we can automate running the tests as part of the build by adding in atestin the Gradle tasks field.
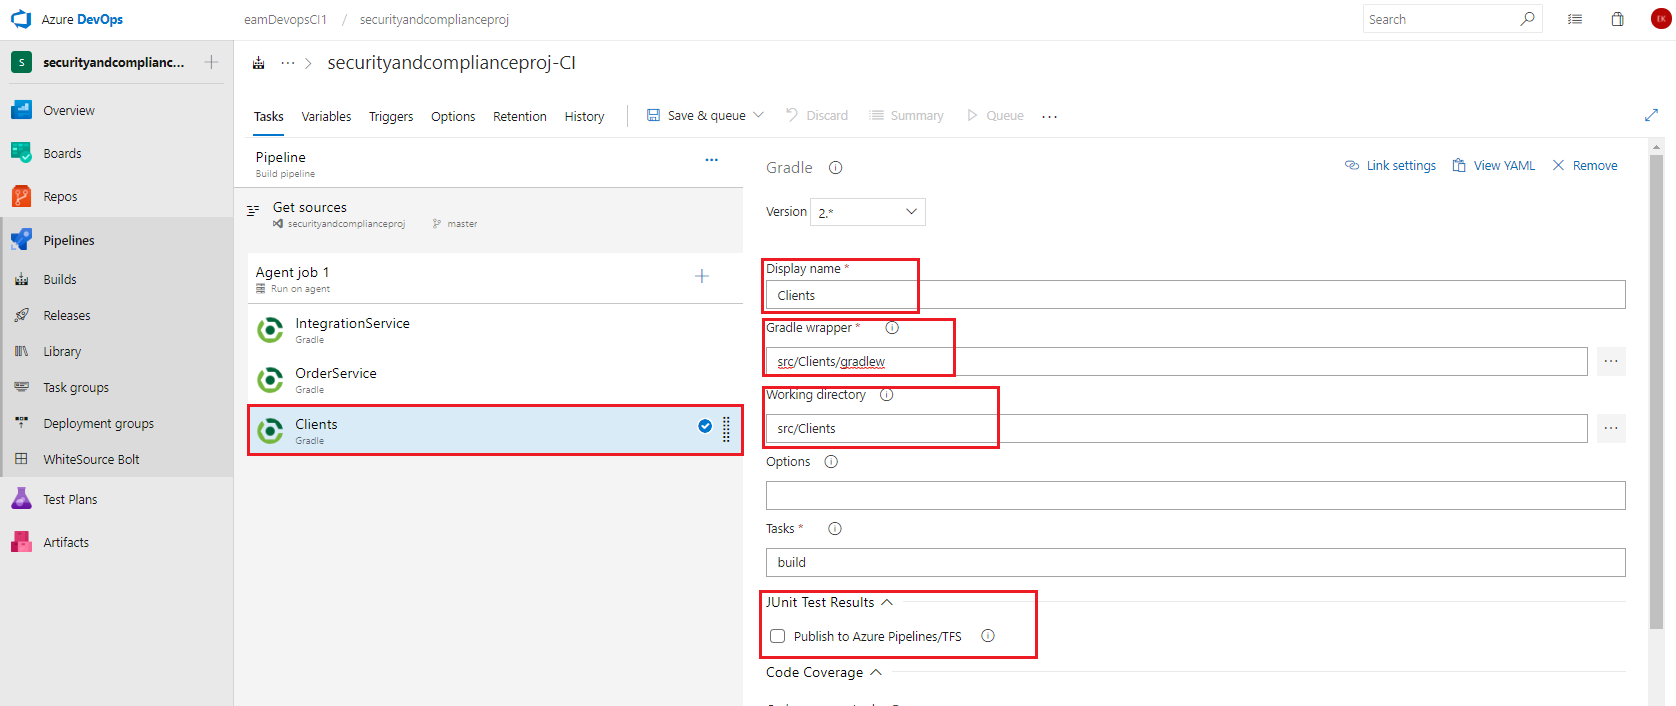
Select the first Gradle task and set the below values, leaving any items not mentioned as their default values.
- Display name: Clients
- gradle wrapper: src/Clients/gradlew (either type or browse using the … button)
- Working Directory: src/Clients(either type or browse using the … button)
- JUnit Test Results: uncheck the checkbox in JUnit Test Results to Publish to TFS/Team Services since we will not be running automated tests in Clients.
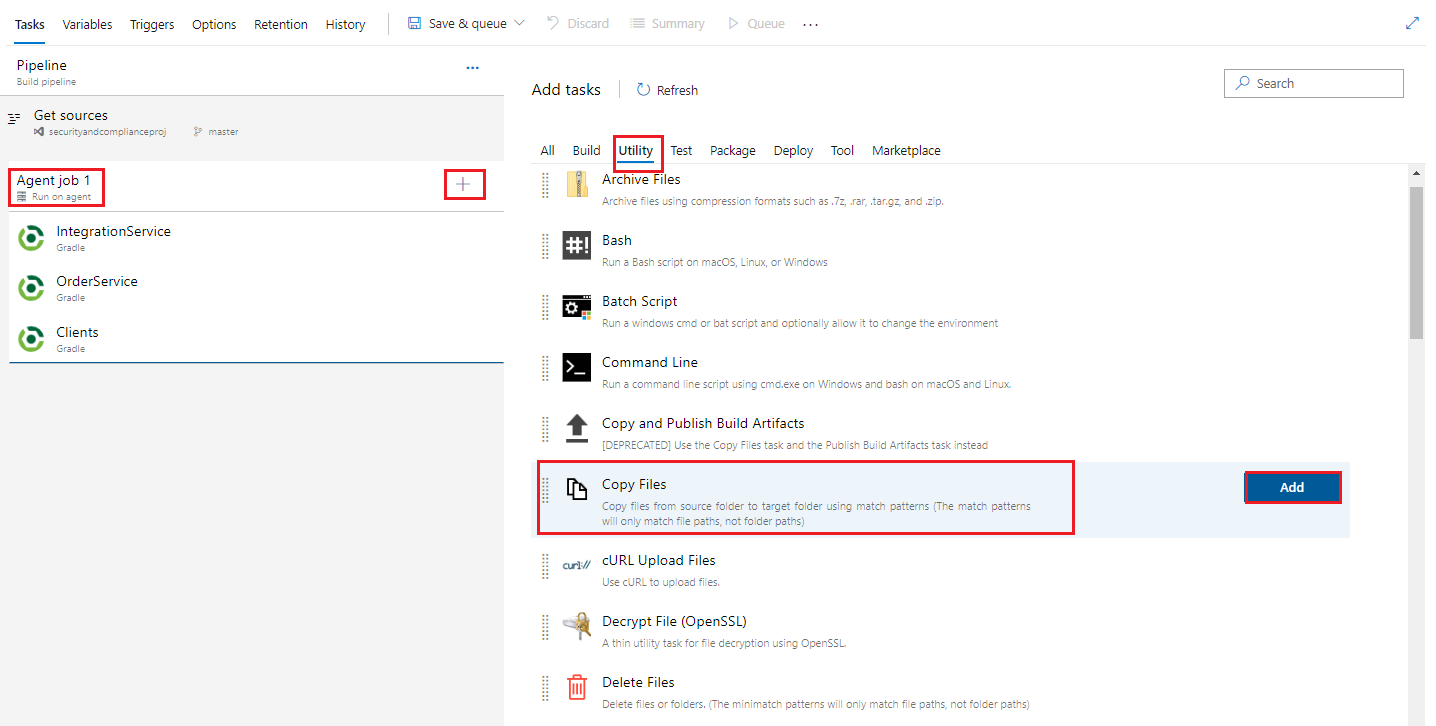
Click on the Agent job 1 section, click the + button to add a task, click on Utility and scroll down to find the Copy Files task. Then, click the Add button twice to add two Copy Files tasks.
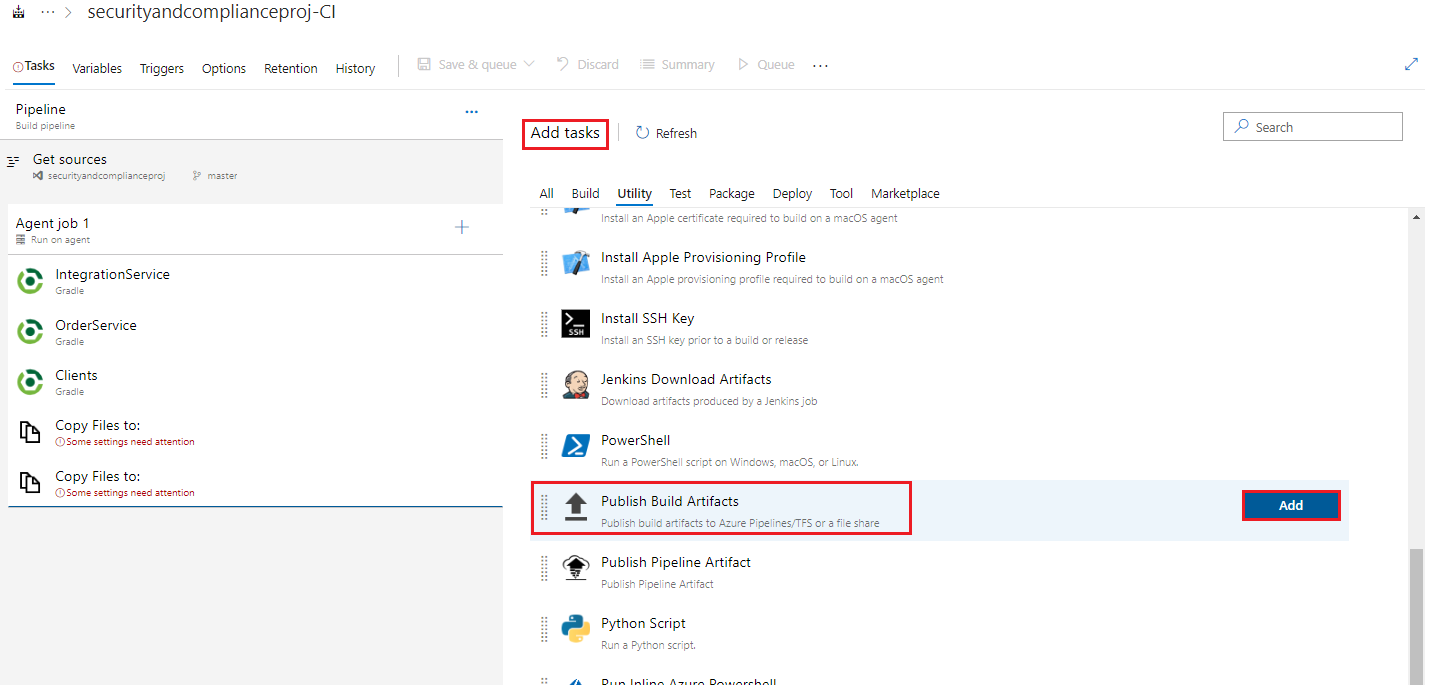
Still in the Add tasks pane under Utility and scroll down to find the Publish Build Artifacts task. Then, click the Add button twice to add two Publish Build Artifact tasks.
Select the first Copy Files to: task, and fill in the listed fields with the below values, leaving any items not mentioned with their default values.
- Source Folder: $(Build.SourcesDirectory)\src (either type or browse using the … button to go to src)
- Contents: */build/libs/!(buildSrc).?ar
- Target Folder: $(build.artifactstagingdirectory)\drop
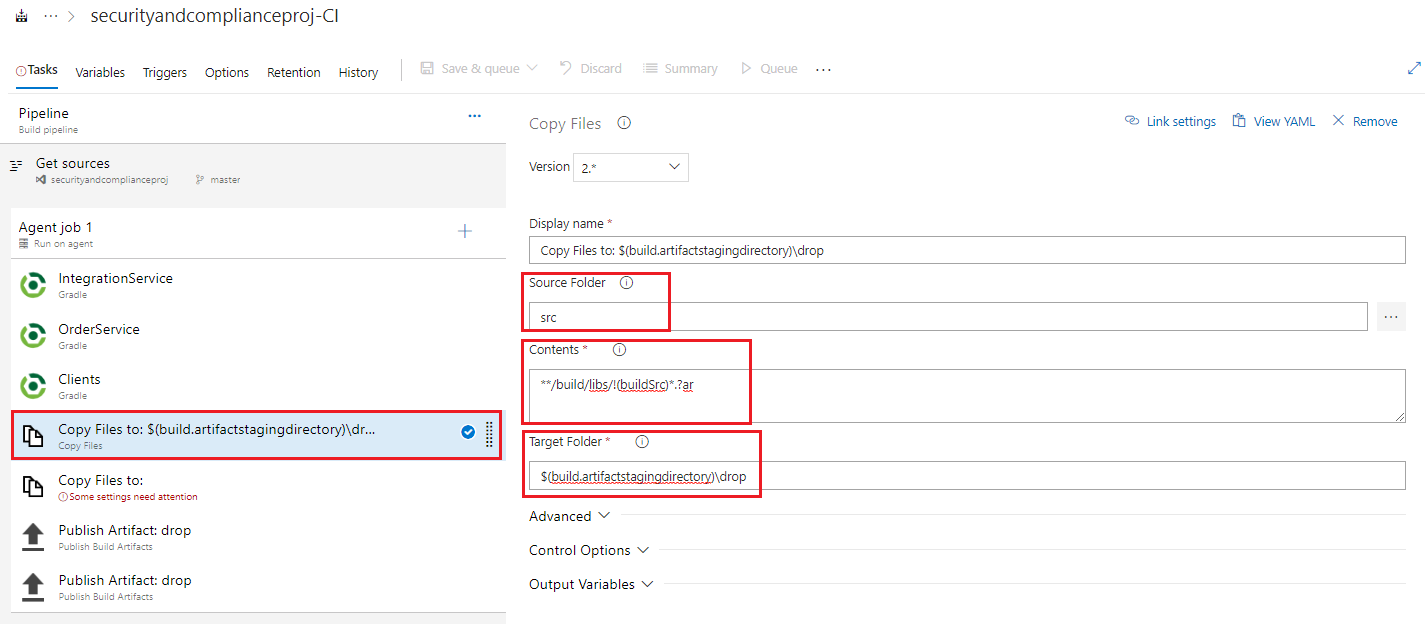
- Note: We will copy the files we want from the build and repo and place them in a staging area on the agent, to be later picked up from there and published as build pipeline artifacts which we can later use in our release pipeline. To view more details about the variables that we are using in the tasks you can take a lok at the page Predefined build variables
Select the second Copy Files to: task, and fill in the listed fields with the below values, leaving any items not mentioned with their default values.
- Source Folder: $(Build.SourcesDirectory)
- Contents: **/deploy/SSH-MRP-Artifacts.ps1 **/deploy/deploy_mrp_app.sh **/deploy/MongoRecords.js
- Target Folder: $(build.artifactstagingdirectory)
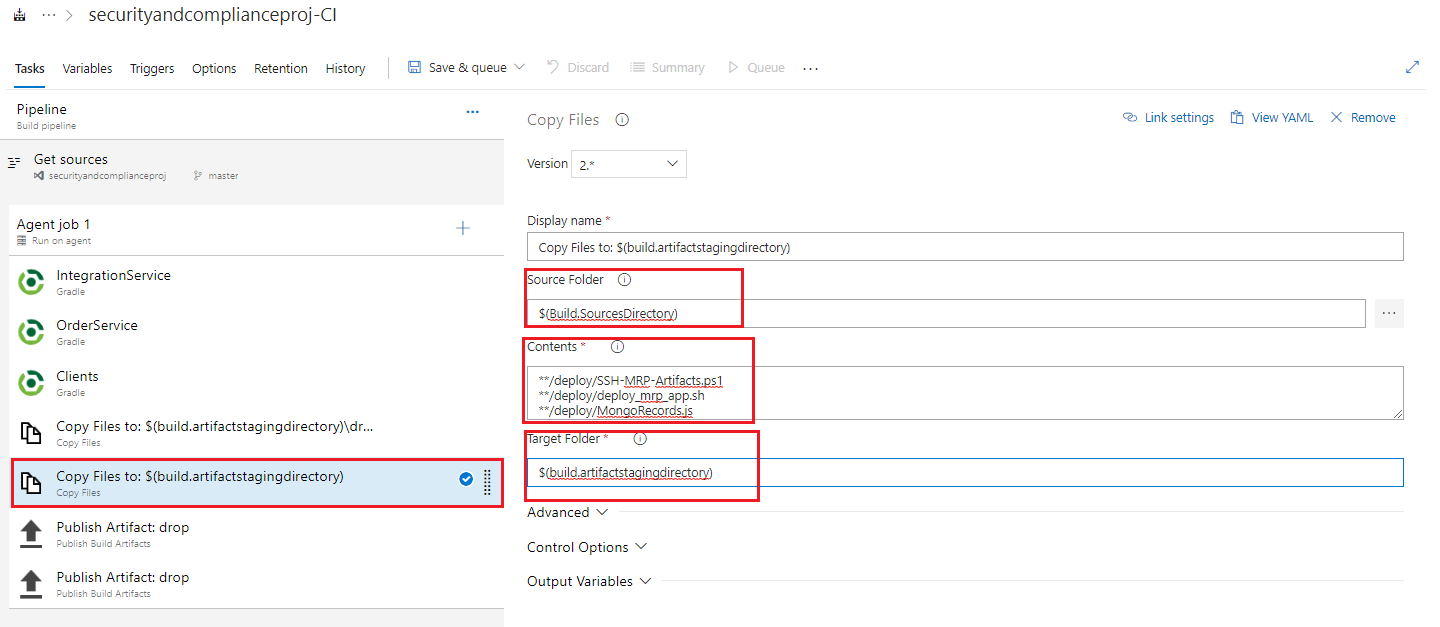
-Note: Try to get the formatting as it appears in the screenshot to ensure the task works smoothly. Ultimately when you check the build artifacts at the end of the lab, you will know if the task is working correctly or not and can troubleshoot or amend as you need.
Select the first Publish Artifact task, and fill in the listed fields with the below values, leaving any items not mentioned with their default values.
- Path to publish: $(build.artifactstagingdirectory)\drop
- Artifact Name: drop
- Artifact publish location: Azure Pipelines/TFS
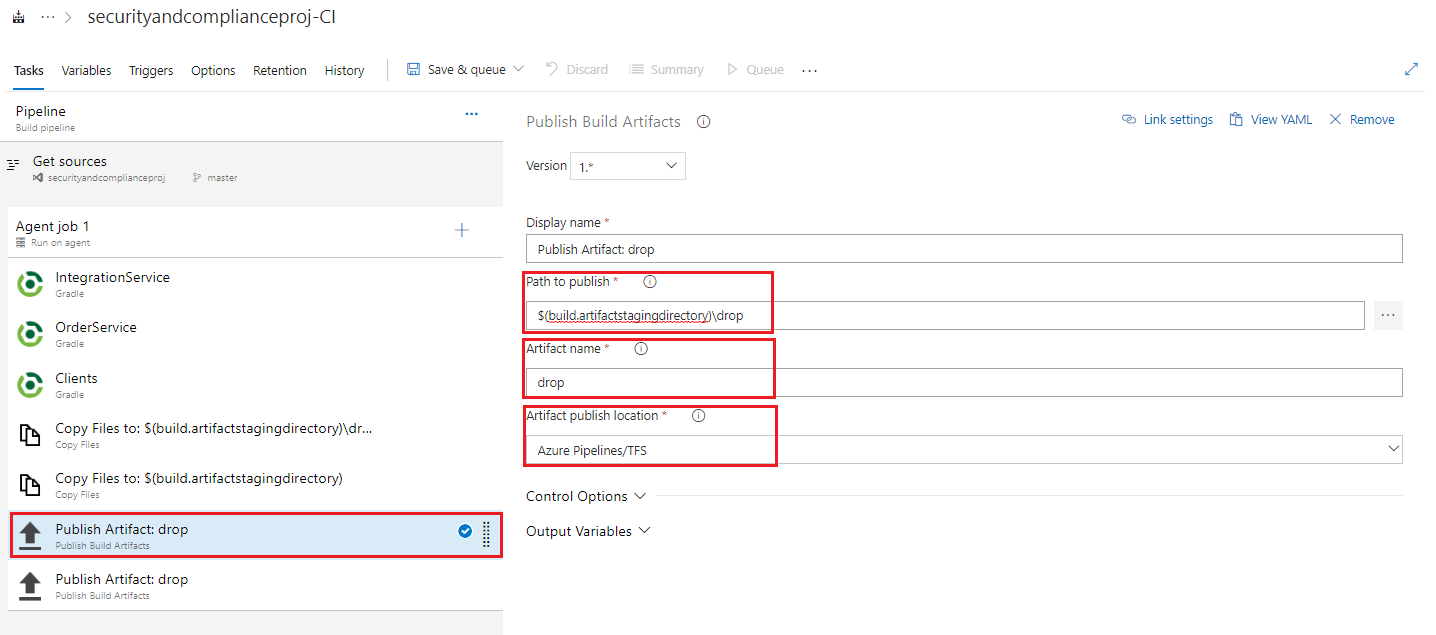
- Note: In these publish tasks, we are taking the items from the agent staging area and publishing them as build pipeline artifacts for later use in our release pipeline. We will not create and deploy using our release pipeline in this lab but if you wish you may retain this build pipeline for your own testing and use later.
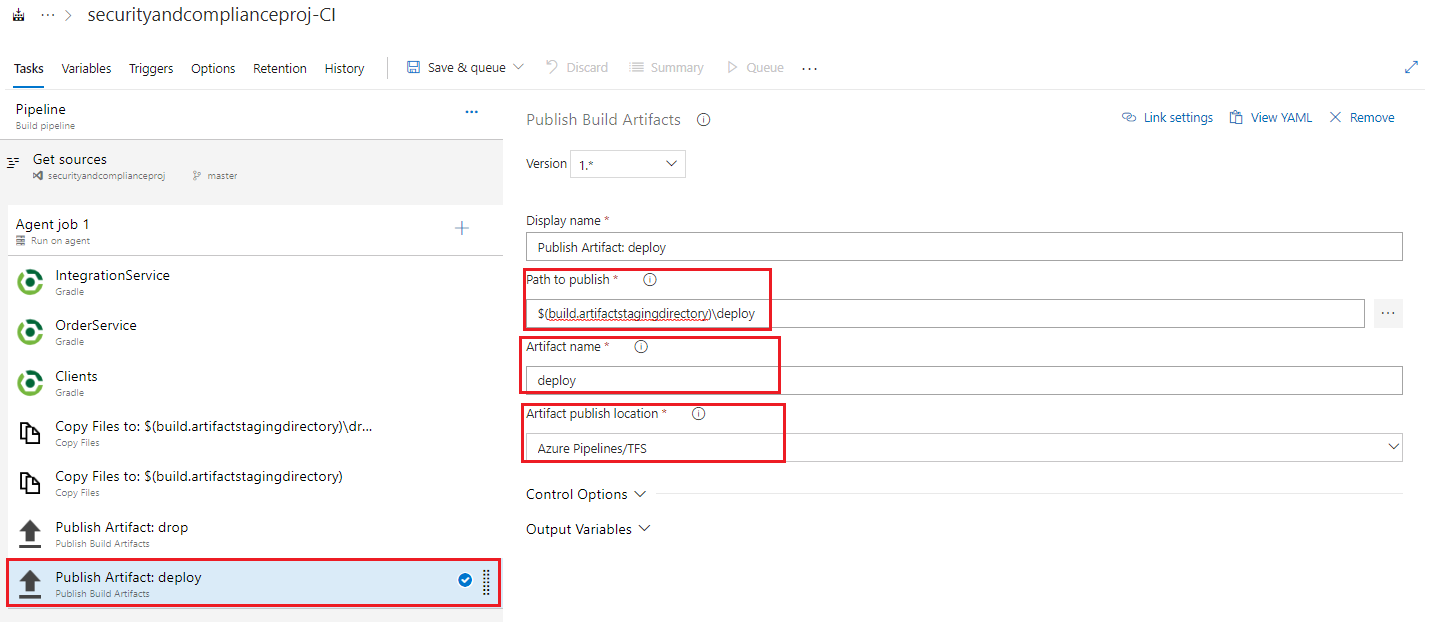
Select the second Publish Artifact task, and fill in the input values with the following:
- Path to publish: $(build.artifactstagingdirectory)\deploy
- Artifact Name: deploy
- Artifact publish location: Azure Pipelines/TFS
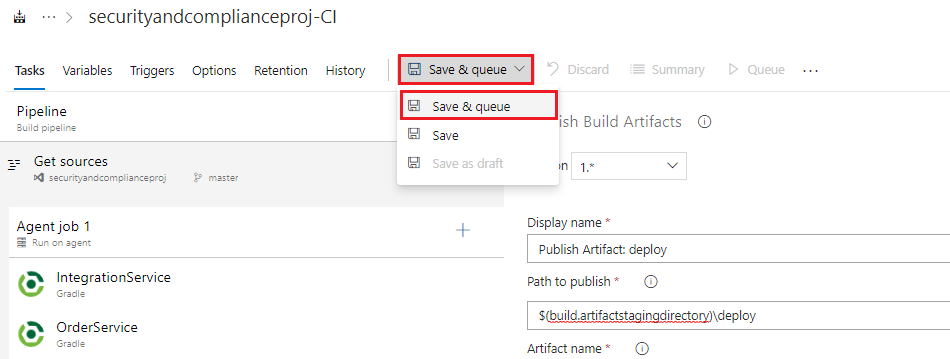
Click Save and Queue, and then select Save and Queue from the drop down options to save the build pipeline and trigger a manual build, and in the Save build pipeline and queue dialogue click Save & queue again.
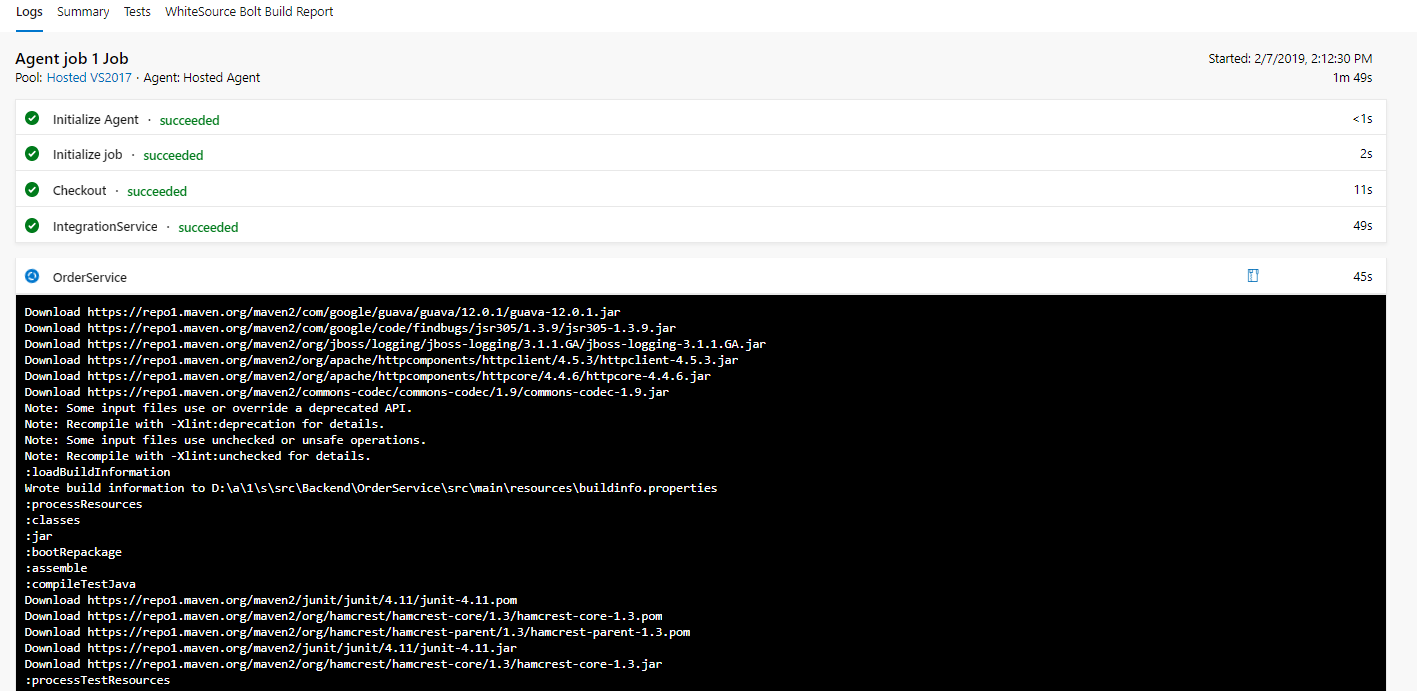
In the resultant Green Banner that appears click on the build number link to view the build output and logs as it progresses
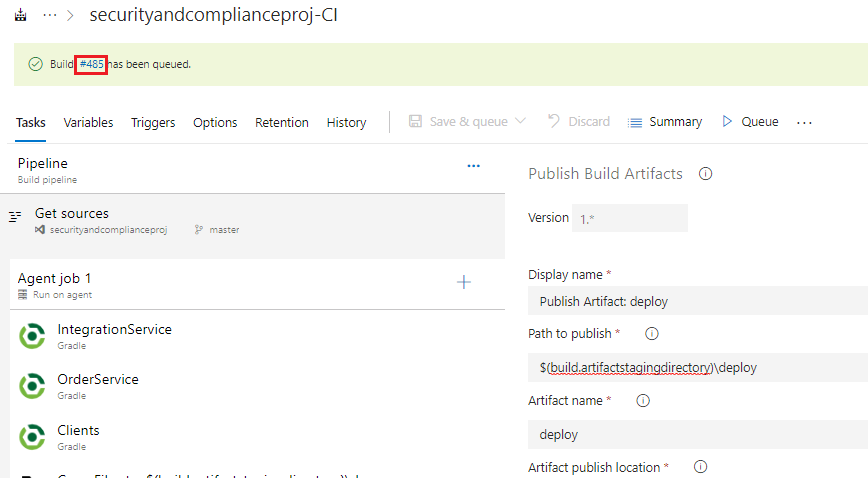
View the output as it progresses and ensure it runs successfully before continuing with the next task.
Task 3: Install WhiteSource Bolt from the Azure DevOps marketplace and activate it
Return to our newly created build pipeline, and under Tasks go to the Agent job 1 section, click the + sign to add a task, then click on Marketplace, type whiteSource in the search dialogue, locate WhiteSource Bolt and click Gt it Free
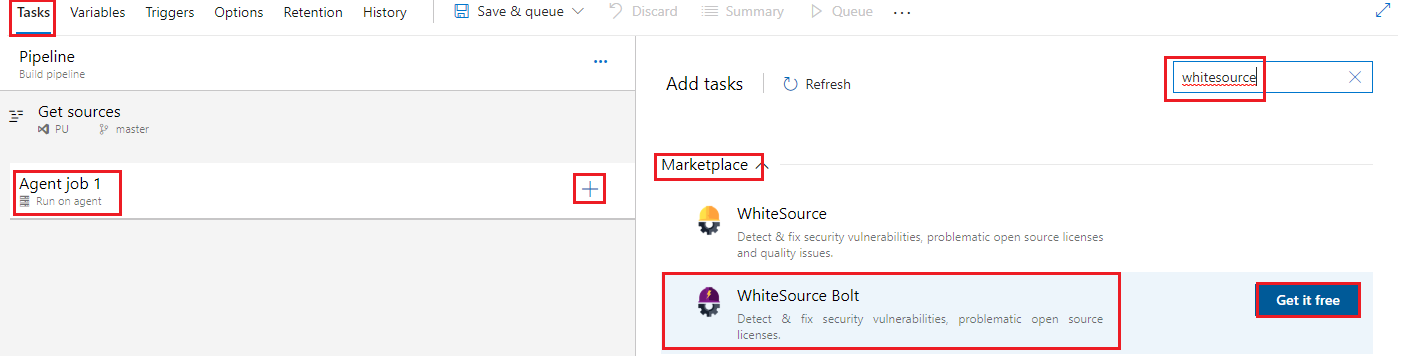
-Note: WhiteSource is for build servers and WhiteSource Bolt is specifically for *Azure DevOps8, hence we will use that.
You are taken to the WhiteSource Bolt page in the Azure DevOps Marketplace, click Get it free

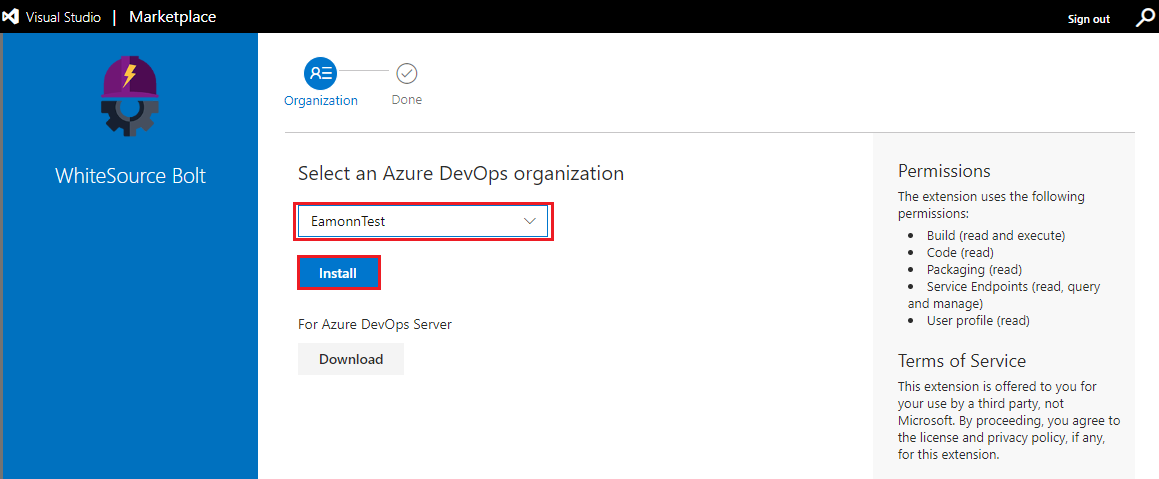
On the Select an Azure DevOps organization page select your Azure DevOps organization and choose Install
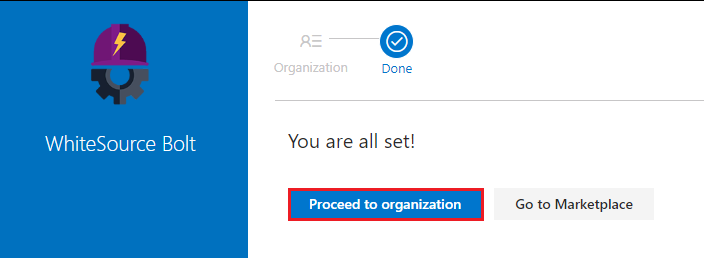
Once installed click Proceed to organization
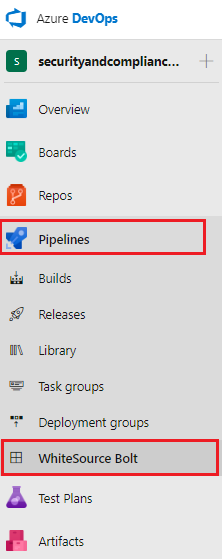
In your Azure DevOps project go to Pipelines and then select WhiteSource Bolt
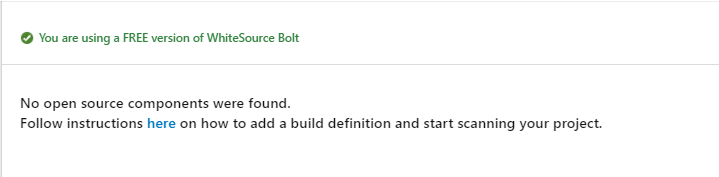
If prompted enter your email address and organization to activate your WhiteSource Bolt extension. You may not need to enter your email address and organization depending on your environment, you may be brought straight to the page You are using a FREE version of WhiteSource Bolt, indicating it is ready to integarte iunto your build pipelines.
Task 4: Add WhiteSource Bolt as a build task in our build pipeline
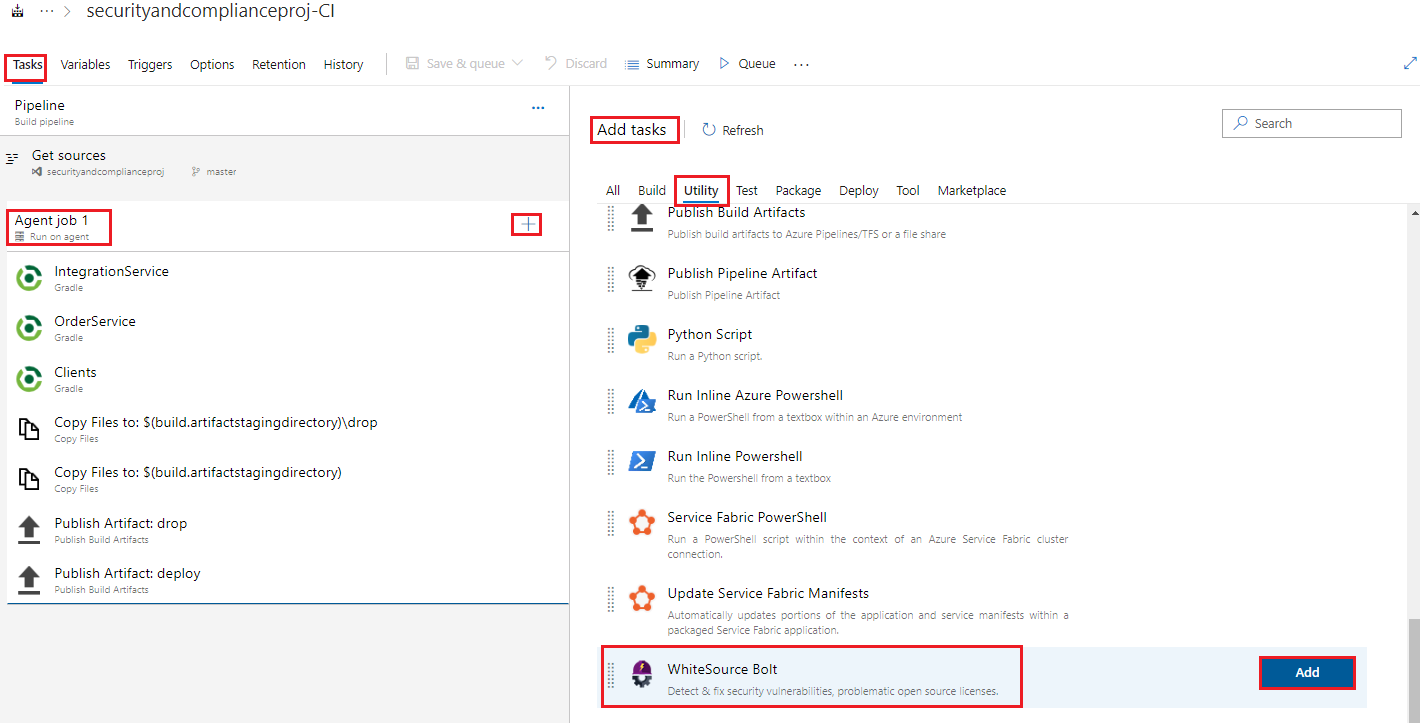
Return to the Build pipeline we created and under Tasks go to the Agent job 1 section, click the + sign to add a task, then click on Utility, and scroll down to the end of the listed items to locate WhiteSource Bolt, then click Add
Move the WhiteSource build task, by clicking on it and dragging it upwards, to occur after the gradle Clients task, or the last gradle build task
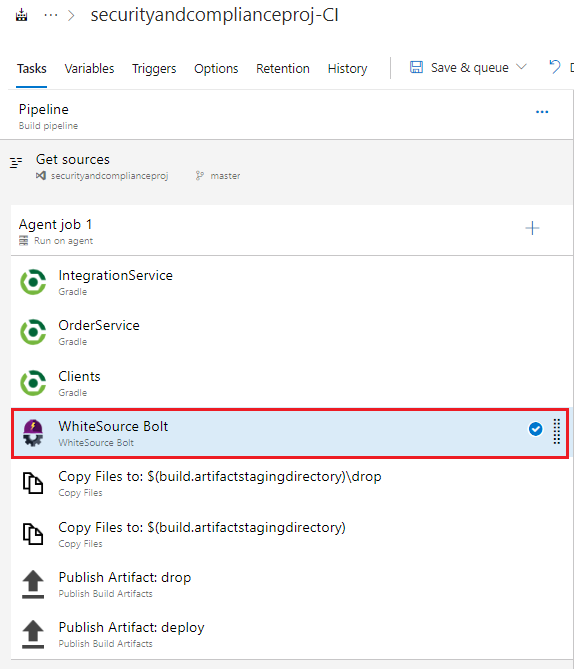
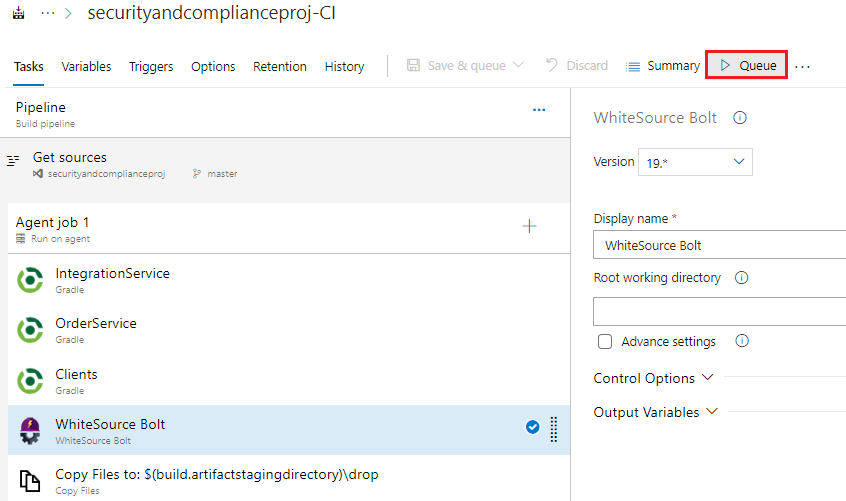
Accept the default values in the WhiteSource Bolt task and Save the build pipeline
Task 5: Run our build pipeline and view WhiteSource Bolt security and compliance report
Start a build by clicking > Queue and then click Queue again when prompted
In the resultant Green Banner that appears click on the build number link to view the build output and logs as it progresses
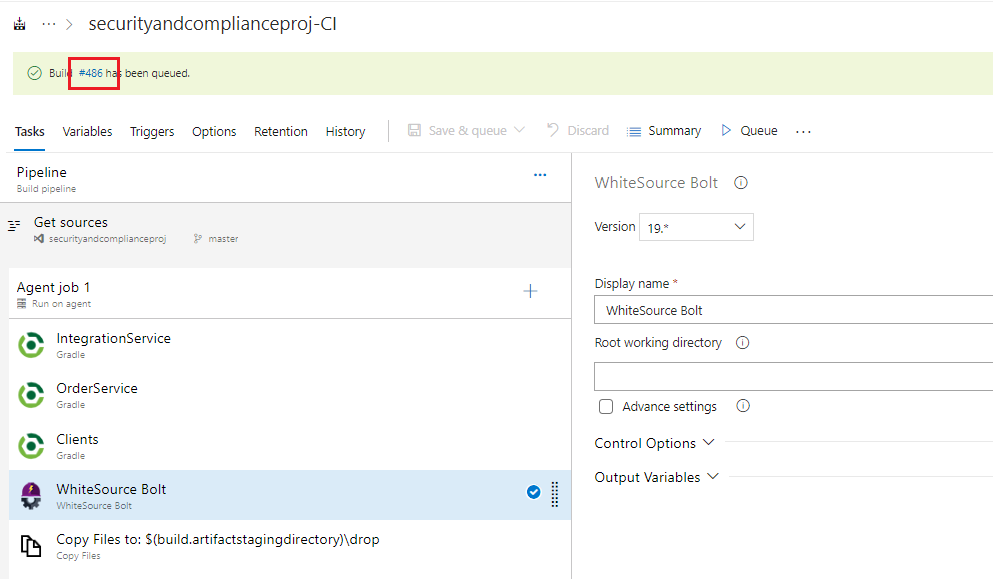
View the build as it progresses and ensure it runs successfully and the WhiteSource Bolt section runs successfully
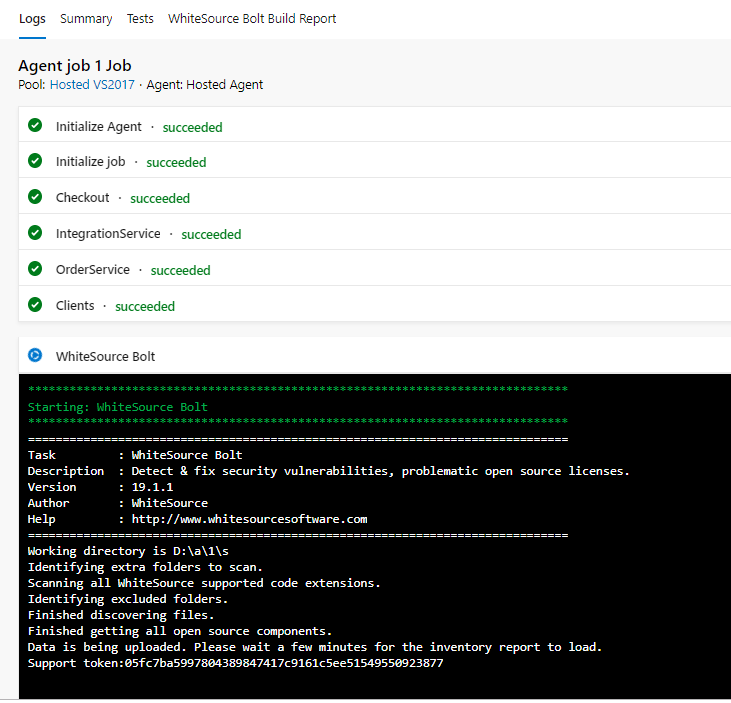
When the build is completed go to Pipelines > WhiteSource Bolt and view the generated report
Scroll through the report and view various elements such as
- Vulnerability Score
- Vulnerable Libraries
- Severity Distribution
- Aging Vulnerable Libraries
- License Risks and Compliance and the associated Risk level: Apache 2.0 is listed with Risk level unknown, and two occurrences of it
- Outdated libraries section > there is one item list
gradle-REL_1.0-milestone-1, view the version details and what the recommendations are i.e.Consider updating to latest version Inventory
- Note: There is also an option to export the report.
Congratulations! You have created an open source based build pipeline and added WhiteSource Bolt to your build pipeline to check for security and compliance vulnerabilities
Summary
In this lab you have completed the following tasks:
- Created an Azure DevOps account and populate the project repository with our application code
- Create a Build pipeline based around open source products
- Installed WhiteSource Bolt from the Azure DevOps Marketplace and activated it
- Added WhiteSource Bolt as a build task in our build pipeline
- Ran our build pipeline and viewed WhiteSource security and compliance report that resulted from scanning our application code.