Friday, September 18, 2020

Steps to Deploy Angular application on Kubernetes -- very good

 Summary : Excellent article which cover complete docker deployments for angular app.

Create agnular app  with ng new


Design  nginx-custom.conf so that it can handle redirects, gzip and other things.

 
Create docker file to multistage build and deploy with custom ngix-custom.conf.


Build and push docker images
    *docker build and docker push.


Publish docker to Kubbernetes cluster 
  • Create a deployment in Kubernetes cluster (kubectl apply -f spa-deployment.yaml)
  • Create a ClusterIP service.kubeclt apply -f SPA-service.yaml
  • Create a load balancer service to access it via some External IP, provided by the service.kubeclt apply -f SPA-load-balancer-service.yaml
  • kubectl get svc -owide
  Now angular appliation avialble with public IP address. 
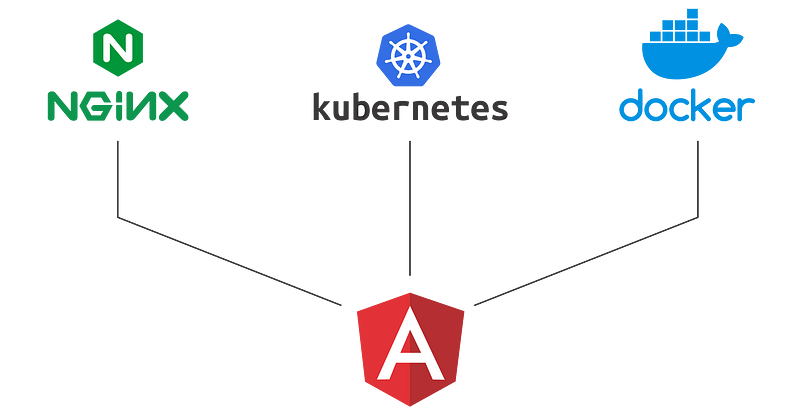

Introduction

Angular is a JavaScript framework for building web applications and apps in JavaScript, HTML, and TypeScript, which is a superset of JavaScript. Angular provides built-in features for animation, HTTP service, and materials which in turn has features such as auto-complete, navigation, toolbar, menus, etc. The code is written in TypeScript, which compiles to JavaScript and displays the same in the browser.

In this tutorial, we will create a basic angular app. Write a docker file to build a compressed angular app and then create deployment manifest for angular application.

Steps to Deploy Angular application on KubernetesSteps to Deploy Angular application on Kubernetes

Prerequisite

Angular: A little knowledge of angular.

Nodejs: To run the application locally, we need node environment.

Docker: Docker CLI should be installed in your system to build and push the image. You can also set up a CI tool to build the docker image. I will talk about this in the next tutorial.

Nginx: Basic knowledge of Nginx configuration.

Kubernetes: Kubernetes is an orchestration tool, where we will deploy the application. For the demo sake, you can use minikube as well.

What we will do

1: Create an Angular application

2: Write custom Nginx config

3: Write a multistage docker file

3: Create a K8s deployment manifest and service manifest

4: Test the application

Step 1: Create an Angular application

Now, let’s create an Angular Application. By running the below command, angular will create and initialize a new Angular app, which we will use to deploy.

ng new spa-demo

After completion of above command, go inside the directory.

cd spa-demo

Run the development server.

ng serve

Now, at visiting http://localhost:4200/, you will see the view of this Angular app.
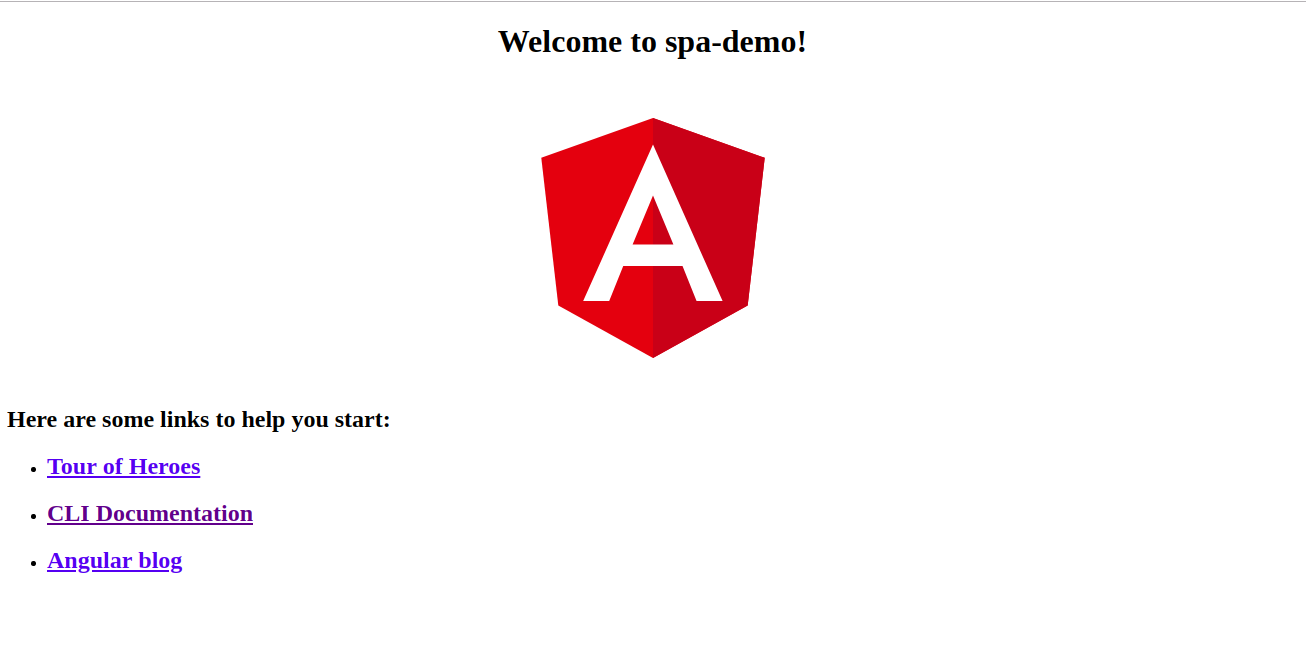
Angular app is ready for productionView of Angular App

Step 2: Write a custom config for Nginx

First, add an Nginx custom configuration file inside the new spa-demo directory, named nginx-custom.conf. Here is the gist link.

# Expires map
map $sent_http_content_type $expires {
default off;
text/html epoch;
text/css max;
application/json max;
application/javascript max;
~image/ max;
}

server {
listen 80;
location / {
root /usr/share/nginx/html;
index index.html index.htm;
try_files $uri $uri/ /index.html =404;
}
expires $expires;
gzip on;
}

The above Nginx custom config contains:

  • Expiration header for images and other content (CSS, HTML etc), which travels through the web to the browser for the maximum amount of time but do change it according to need.
  • Every single page application uses its routing module to go to its route, but it needs to go through its home route, so we need to redirect every route to home route, then the single page application will take care of rest of the thing.
  • At last, we enable gzip compression.

Step 3: Create a multistage docker file to build the angular application

Now, create a Dockerfile inside the spa-demo project directory, named- Dockerfile. Here is the gist link.

# Stage 0, "build-stage", based on Node.js, to build and compile the frontend
FROM node:10.8.0 as build-stage
WORKDIR /app
COPY package*.json /app/
RUN npm install
COPY ./ /app/
ARG configuration=production
RUN npm run build -- --output-path=./dist/out --configuration $configuration

# Stage 1, based on Nginx, to have only the compiled app, ready for production with Nginx
FROM nginx:1.15
#Copy ci-dashboard-dist
COPY --from=build-stage /app/dist/out/ /usr/share/nginx/html
#Copy default nginx configuration
COPY ./nginx-custom.conf /etc/nginx/conf.d/default.conf

The above Dockerfile consists of two stages:

First stage: Create a node environment and build the angular application with production configuration.

Second stage: Copy the dist folder from the previous stage to Nginx container and copy nginx-custom.conf inside the nginx

Build and push the docker image

Docker build command

docker build -t inyee/spa-demo:v1 .
docker push inyee/spa-demo:v1

Docker push to docker registry.

docker push inyee/spa-demo:v1

Step 4: Create a K8s deployment manifest and service manifest

To deploy the Angular application in any of the Kubernetes environments, the deployment manifest for angular is listed below. Before deploying the application to production, make sure you modify the manifest file to best suit your needs. You can change the name of the Deployment and the labels, and change your Docker registry and image tag accordingly.

The deployment manifest gist link.

apiVersion: apps/v1beta1
kind: Deployment
metadata:
name: deployment-name
spec:
replicas: 1
template:
metadata:
labels:
label-key : label-value
spec:
containers:
- name: deploment-container-name
image: inyee/spa-demo:v1
imagePullPolicy: Always
ports:
- containerPort: 80

Create a normal service to access the application internally, or you can use this service in ingress to expose it to some domain, named SPA-service.yaml

apiVersion: v1
kind: Service
metadata:
labels:
service-label-key: service-label-value
name: service-name
spec:
type: ClusterIP
ports:
- name: service-port-name
port: 80
protocol: TCP
selector:
deployment-label-key: deployment-label-value

For the demo purpose, create a load balancer service file to access it outside the Kubernetes cluster. Make sure Lable selector is the same as the deployment label, named SPA-load-balancer-service.yaml

apiVersion: v1
kind: Service
metadata:
labels:
service-label-key: service-label-value
name: service-name-loadbalancer
spec:
type: LoadBalancer
ports:
- name: service-port-name
port: 80
protocol: TCP
selector:
deployment-label-key: deployment-label-value
#for creating a deployment in kubernetes
kubectl apply -f spa-deployment.yaml
#for internal communicating to angualar application
kubeclt apply -f SPA-service.yaml
#for access the angular application outside kubernetes
kubeclt apply -f SPA-load-balancer-service.yaml

Run the command listed below to deploy the angular application in Kubernetes environment.

  • Create a deployment in Kubernetes cluster
 kubectl apply -f spa-deployment.yaml
  • Create a ClusterIP service.
kubeclt apply -f SPA-service.yaml
  • Create a load balancer service to access it via some External IP, provided by the service.

kubeclt apply -f SPA-load-balancer-service.yaml
kubectl get svc -owide
  • Run the below command to get External IP of the of service.
kubectl get svc
NAME TYPE CLUSTER-IP EXTERNAL-IP PORT(S) AGE
service-name ClusterIP xx.xx.xx.xx <none> 80:31527/TCP 1d
service-name-loadbalancer LoadBalancer xx.xx.xx.xx xx.xx.xx.xx 80:31202/TCP 1d

Go to the external IP on the browser, you will see the same angular app which we had created initially.

Angular app is ready for productionAngular app is ready for production

That’s it! Now our Angular app is ready for production!

Tuesday, September 15, 2020

Microservice Architectures with Azure Functions


Synchronous Requests

If you want to communicate synchronously from a client to a function (HTTP request with HTTP response), then functions offer the possibility to be called via HTTP triggers. 
But the initially simple thought, is followed by some some issues regarding asynchrony concerning a microservice architecture.

As shown, it is technically possible to make functions communicate directly (synchronously) with each other (using HTTP triggers). 

However, this does not correspond to the official Microservice-Patterns, since direct dependencies are created here. 
Microsft even calls this an ANTI-PATTERN:

(Source: https://docs.microsoft.com/de-de/dotnet/standard/microservices-architecture/architect-microservice-container-applications/communication-in-microservice-architecture)

If you still want a connected client to be able to retrieve data directly from a function synchronously, the logical idea is that the functions call each other asynchonously (via HTTP trigger, EventHub or ServiceBus). 
However, the good idea initially disappoints quickly, because it is not technically possible due to the statelessness of the functions to wait asynchronously for a response from one or more functions.

Thus a synchronous call of a function by a client can only responded synchronously if the requested function don´t need to speak with any other functions at all. 
While this is basically possible, the practical use cases of micoservices show, that a state in which a microservice does not have to talk to other services does not last long. 
Progressive development and new features quickly create new dependencies that require communication between the microservices.

REPORT THIS AD

Due to the mentioned points, the synchronous communication of clients with the functions based on a microservice architecture is not recommended and principles for an asynchronous communication should be used.

2. Asynchronous Communication via Broker/Hub

So if asynchronous communication within functions is not possible, the first logical idea is to set up the architecture without functions.
First, you have to consider how to make it possible for the client (frontend) to get replies asynchronously. The usual approach for this is real time web frameworks, such as eg. SignalR, Grpc and others. 
Although Grpc itself can hardly be surpassed in terms of latency and speed, it is difficult to integrate it into a React or Angular web app with the usual board tools. Common methods for this are currently the detour via an Envoy Proxy. 
However, during the development of such an environment, it soon becomes apparent that this technology does not seem to have matured yet. 
For example, generating the prototype files for TypeScript involves significant problems. For sustainable and stabile environments you should better resort to battle-proofed technologies. Here is SignalR quite a good choice

Now that the return channel to the client has been clarified, the question is how the individual services communicate with each other. 
To ensure complete asynchrony of the services it should be advantageous if the services do not know each other. 
Consequently, a distribution point would make sense here. Here, the PUB / SUB pattern is a popular method. GRPC would therefore need its own GRPC broker and SignalR would need its own HUB.
Without going too deeply into detail, you quickly realizes that such an architecture always involves a single point of failure.

3. Asynchronous Communication One-to-One

If now the communication of the services via a broker/hub is not considered meaningful, a direct (but asynchronously) communication of the services with each other is the only thing that remains.
After some research, you quickly gets the idea to use EventHub triggers or ServiceBus triggers in combination with functions. Here, a message is passed through as a relay race to the involved functions on the appropriate trigger and returned at the end again by SignalR.

Passing messages like a relay race, can quickly lead to problems. If you think to an aggregation function, data must be collected from other services and thus it is difficult to treat the message in the sense of a relay race.

The officially microsoft recommended technology for asynchronous communication within functions are so-called durable functions.
However, there were significant lags in the perfomance test. 2 out of 10 calls showed response times of over 15 seconds. And event the other 80 percent of the requests take up to 0,7 sec for a response. Due to this fact, durable functions were not considered further.

In order to realize ideas like an aggregation function, stateful services are required which are capable of waiting asynchronously for a response message. 
With the idea of ​​direct service communication without a broker / hub, the idea of ​​peer to peer services lends itself. For this GRPC is a very good choice.

To overcome the problem of the Envoy Proxies, we simply use a function that acts as a gateway to send messages to the Grpc serives. 
Thus, you can also be prevented that a client must know all the service addresses, these can be very well processed in the sense of a gateway here. 
Because Azure’s functions/gateways scale horizontally and Azure ensures high availability, we do not consider such a gateway a single point of failure.

To find the way back to the client, we use a function in the same way to return the messages on the SignalR channel.

4. Result

You can say that functions have their justification, eg. the approach of database-triggers is quite a smart approach to bring events to the client quickly without the effort of extra business logic to operate.
However, you can not ignore the fact of their latency (especially with Durable Functions). In view of the asynchronicity of a microservice environment, they are not to be regarded as a panacea. Much more they should be chosen for a meaningful combination of stateful services together with stateless functions.

Here an idea of a meaningful architecture combined with statefull container services and sateless functions.

Werbeanzeigen

Monday, September 14, 2020

Azure Functions Proxies in Action

 Azure Functions Proxies is serverless API toolkit that basically allows you to modify the requests and responses of your APIs. This feature might sounds a little bit simple but it’s not. With AF Proxies you can expose your multiple Azure Function apps built as a Microservice Architecture in a single unified endpoint. Also, during development you can use the proxies to mock up the responses of your APIs (Mock APIs). Last but not least, the proxies can be used to quickly switch to different versions of your APIs. In this post we will see all these in action using a a sceleton of an e-shop app built with Azure Functions using a microservice architecture. The post will also save you some time by explaining how to setup your development environment and resolve common errors when using the proxies either in development or production environment. Are your ready? Let’s start!

Download and setup the sample app

To follow along with the post clone the associated repository using the following command:

Prerequisites

In order to build and run the e-shop app locally you need to have the followings installed:

After installing azure-functions-core-tools npm package you need to configure some application arguments for the Basket.APICatalog.API and Ordering.API function apps projects inside the solution. azure-functions-core-tools package is usually installed (in Windows machines) inside the %userprofile%\AppData\Roaming\npm\node_modules\azure-functions-core-tools folder. For each of the following projects, right click the project, select Properties and then switch to the Debug tab. Configure the projects as follow:

  1. Catalog.API:
    • Launch: Executable
    • Executable: dotnet.exe
    • Application arguments: %userprofile%\AppData\Roaming\npm\node_modules\azure-functions-core-tools\bin\func.dll host start –pause-on-error –port 1072
  2. Basket.API:
    • Launch: Executable
    • Executable: dotnet.exe
    • Application arguments: %userprofile%\AppData\Roaming\npm\node_modules\azure-functions-core-tools\bin\func.dll host start –pause-on-error –port 1073
  3. Ordering.API:
    • Launch: Executable
    • Executable: dotnet.exe
    • Application arguments: %userprofile%\AppData\Roaming\npm\node_modules\azure-functions-core-tools\bin\func.dll host start –pause-on-error –port 1074

In case azure-functions-core-tools have been installed in some other path or you are on Linux or Mac environment you need to alter the Application arguments func.dll path accordingly

The configurations should look like this:


Mocking APIs


We will start by using AF Proxies for mocking API responses. Mocks are useful in scenarios when backend implementation takes time to finish and you don’t want to block and make the front-end team waiting for it. We will use the Catalog.API function app to test our first proxy. Catalog.API microservice is supposed to expose two endpoints for accessing catalog items: /api/items for retrieving all items and /api/items/{id} for accessing a specific item. Before implementing those endpoints in backend we want to provide mock data to front-end developers so that they can move forward with their implementation. Proxies are defined inside a proxies.json configuration file at the root of the project. Create a new proxies.json file at the root of Catalog.API project and set its contents as follow:

1
2
3
4
5
6
7
8
9
10
11
12
13
14
15
{
    "proxies": {
      "mock.catalog.items": {
        "matchCondition": {
          "methods": [ "GET" ],
          "route": "/api/items"
        },
        "responseOverrides": {
          "response.body": "{'message' : 'Hello world from proxies!'}",
          "response.headers.Content-Type": "application/json"
        }
      }
    }
  }

Build, right click and debug the Catalog.API app. Navigate to http://localhost:1072/api/items and confirm that you get your first proxy response: “Hello world from proxies!”.

When the app fires up, you will get some messages on the console, printing all the endpoints available on the function app.

Of course the “hello world from proxies” message is not what you want, instead you want to return a valid items array:

1
2
3
4
5
6
7
8
9
10
11
12
13
14
15
16
17
18
19
20
21
22
23
24
25
26
27
28
29
30
31
32
33
34
35
36
37
38
{
    "proxies": {
   
      "mock.catalog.items": {
        "matchCondition": {
          "methods": [ "GET" ],
          "route": "/api/items"
        },
        "responseOverrides": {
          "response.body": [
            {
              "Id": 1,
              "CatalogType": "T-Shirt",
              "CatalogBrand": ".NET",
              "Description": ".NET Bot Black Hoodie, and more",
              "Name": ".NET Bot Black Hoodie",
              "Price": 19.5,
              "availablestock": 100,
              "onreorder": false
            },
            {
              "Id": 2,
              "CatalogType": "Mug",
              "CatalogBrand": ".NET",
              "Description": ".NET Black & White Mug",
              "Name": ".NET Black & White Mug",
              "Price": 8.5,
              "availablestock": 89,
              "onreorder": true
            }
          ],
          "response.headers.Content-Type": "application/json"
        }
   
      }
    }
  }

If you build and try again the /api/items endpoint you will get back the two items defined in the request.body property. Now let’s break down how Azure function proxies.json file works. Inside the proxies property we define as many proxies we want. In our example we created a proxy named mock.catalog.items that returns some mock data for the route /api/items. The matchCondition property defines the rules that match the proxy configuration that is the HTTP methods and the route. We defined that when an HTTP GET request to /api/items reaches the app we want to override the response and send back a JSON array. We also defined that the response type is of type application/json.

1
2
3
4
"responseOverrides": {
    "response.body": [..],
    "response.headers.Content-Type": "application/json"
  }

When the actual endpoint is ready and you want to send back the real data all you need to do is remove the mock.catalog.items proxy from the proxies configuration. The GetItems HTTP triggered function is responsible to return all the items defined in the catalog.items.json file at the root of the project.

1
2
3
4
5
6
7
8
9
10
11
12
13
14
15
16
public static class GetItems
{
    [FunctionName("GetItems")]
    public static async Task<IActionResult> Run(
        [HttpTrigger(AuthorizationLevel.Function, "get",
        Route = "items")] HttpRequest req,
        ILogger log, ExecutionContext context)
    {
        string catalogItemsFile = Path.Combine(context.FunctionAppDirectory, "catalog.items.json");
        string itemsJson = File.ReadAllText(catalogItemsFile);
 
        var items = JsonConvert.DeserializeObject<List<CatalogItem>>(itemsJson);
 
        return new OkObjectResult(items);
    }
}

Now let’s see how to define a proxy that listens to the /api/items/{id} endpoint and returns a single catalog item. Add the following proxy to the proxies.json file:

1
2
3
4
5
6
7
8
9
10
11
12
13
14
15
16
17
18
19
20
21
22
23
24
25
{
    "proxies": {
      "mock.catalog.item": {
        "matchCondition": {
          "methods": [ "GET" ],
          "route": "/api/items/{id}"
        },
        "responseOverrides": {
          "response.body": {
            "Id": 1,
            "CatalogType": "T-Shirt",
            "CatalogBrand": ".NET",
            "Description": ".NET Bot Black Hoodie, and more",
            "Name": ".NET Bot Black Hoodie",
            "Price": 19.5,
            "availablestock": 100,
            "onreorder": false
          },
          "response.headers.Content-Type": "application/json"
        }
   
      }
    }
  }

The mock.catalog.item proxy will return the same catalog item for all requests to /api/items/{id} where {id} is a route parameter.

The GetItem function returns the real item read from the catalog.items.json file.

1
2
3
4
5
6
7
8
9
10
11
12
13
14
15
16
17
18
19
20
21
[FunctionName("GetItem")]
public static async Task<IActionResult> Run(
    [HttpTrigger(AuthorizationLevel.Function, "get",
    Route = "items/{id}")] HttpRequest req,
    int id,
    ILogger log, ExecutionContext context)
{
 
    string catalogItemsFile = Path.Combine(context.FunctionAppDirectory, "catalog.items.json");
    string itemsJson = File.ReadAllText(catalogItemsFile);
 
    var items = JsonConvert.DeserializeObject<List<CatalogItem>>(itemsJson);
 
    var item = items.FirstOrDefault(i => i.Id == id);
 
    if (item != null)
        return new OkObjectResult(item);
    else
        return new NotFoundObjectResult("Item  not found");
 
}

API versioning

Now let’s assume you have decided to envolve your catalog api and introduce a new version where a new item property is added. Before exposing your new version you would also like to test it in the production environment and when you are sure that it works fine switch all your clients to it. The V2_GetItems function returns catalog items with a new property named Image. Notice that the new route defined is v2/items

1
2
3
4
5
6
7
8
9
10
11
12
13
14
[FunctionName("V2_GetItems")]
public static async Task<IActionResult> Run(
    [HttpTrigger(AuthorizationLevel.Function, "get",
    Route = "v2/items")] HttpRequest req,
    ILogger log, ExecutionContext context)
{
    string catalogItemsFile = Path.Combine(context.FunctionAppDirectory, "catalog.items_v2.json");
    string itemsJson = File.ReadAllText(catalogItemsFile);
 
    var items = JsonConvert.DeserializeObject<List<CatalogItem>>(itemsJson);
 
    return new OkObjectResult(items);
         
}
1
2
3
4
5
6
7
8
9
10
11
12
13
14
15
public class CatalogItem
{
    public int Id { get; set; }
    public string Name { get; set; }
    public string Description { get; set; }
    public decimal Price { get; set; }
    public string CatalogType { get; set; }
    public string CatalogBrand { get; set; }
    public int AvailableStock { get; set; }
    public bool OnReorder { get; set; }
 
    // Added for V2 version
    [JsonProperty(NullValueHandling = NullValueHandling.Ignore)]
    public string Image { get; set; }
}

Of course you don’t want your clients to change their endpoint to /api/v2/items but use the default /api/items instead. All you have to do is define a new proxy that forwards all requests to api/items to api/v2/items, processed by the new function.

1
2
3
4
5
6
7
8
9
10
11
12
{
    "proxies": {
      "v2.catalog.items": {
        "matchCondition": {
          "methods": [ "GET" ],
          "route": "/api/items/"
        },
        "backendUri": "http://localhost:1072/api/v2/items"
      }
    }
  

In this proxy configuration we introduced a new property named backendUri which is the URL of the back-end resource to which the request will be proxied. The backendUri could be any valid URL that may return a valid respond for your app. For example assuming you were building a weather API the “backendUri” could be https://some-weather-api.org/ (it isn’t an real weather endpoint). Also it is most likely that you would like to pass some information to the API such as the location that you wish to search the weather for or some subscription key required by the api. The requestOverrides property can be used to configure that kind of stuff as follow:

1
2
3
4
5
6
7
8
9
10
11
12
13
14
15
16
17
{
    "proxies": {
        "some-weather-api": {
            "matchCondition": {
                "methods": [ "GET" ],
                "route": "/api/weather/{location}"
            },
            "backendUri": "https://some-weather-api.org/",
            "requestOverrides": {
                "backend.request.headers.Accept": "application/xml",
                "backend.request.headers.x-weather-key": "MY_WEATHER_API_KEY",
                "backend.request.querystring.location:": "{location}"
            }
        }
    }
}

The previous configuration listens to your function’s endpoint /api/weather/{location} and proxies the request to https://some-weather-api.org.org. Before proxying the request adds some headers required by the some-weather-api. Also notice how the {location} parameter value is added to the query string of the backend URI resulting to a https://some-weather-api.org?location={location} request.

Unified API Endpoints


When building microservices using Function Apps each function app ends up with a unique endpoint as it was a different App Service. The e-shop application is broken to 3 microservices, Basket.APICatalog.API and Ordering.API and when deployed on Azure ends up with the following hosts:

What you really want for your clients thought is a single unified endpoint for all of your APIs such as https://my-eshop/azurewebsites.net. You can use AF proxies to proxy requests to the internal function apps based on the route. In the solution you will find an Azure Function App named ProxyApp that contains the proxies required to expose all e-shop APIs as a unified API. Let’s see the proxies.json file for this app.

1
2
3
4
5
6
7
8
9
10
11
12
13
14
15
16
17
18
19
20
21
22
23
24
25
26
27
28
29
30
31
32
33
34
35
36
37
38
39
40
41
42
43
44
45
46
47
48
{
    "proxies": {
      "catalog.item": {
        "matchCondition": {
          "methods": [ "GET" ],
          "route": "/api/items/{id}"
        },
        "backendUri": "%catalog_api%/items/{id}",
        "debug": true
      },
      "catalog.items": {
        "matchCondition": {
          "methods": [ "GET" ],
          "route": "/api/items"
        },
        "backendUri": "%catalog_api%/items"
      },
      "baskets.get": {
        "matchCondition": {
          "methods": [ "GET" ],
          "route": "/api/baskets/{id}"
        },
        "backendUri": "%basket_api%/baskets/{id}"
      },
      "baskets.update": {
        "matchCondition": {
          "methods": [ "PUT" ],
          "route": "/api/baskets"
        },
        "backendUri": "%basket_api%/baskets"
      },
      "baskets.delete": {
        "matchCondition": {
          "methods": [ "DELETE" ],
          "route": "/api/baskets/{id}"
        },
        "backendUri": "%basket_api%/baskets/{id}"
      },
      "orders.list": {
        "matchCondition": {
          "methods": [ "GET" ],
          "route": "/api/orders"
        },
        "backendUri": "%ordering_api%/orders"
      }
    }
  }

There are proxy configurations for all available endpoints in the e-shop app. The new and most interesting thing on the above configuration though is the way the backendUri properties are defined. Instead of hard-coding the different function apps endpoints, we used settings properties surrounded with percent signs (%). Anything that is surrounded with the percent sign will be replaced with the respective app setting defined in the local.settings.json locally. We will see how this works up on Azure soon. This means that %catalog_api%%basket_api% and %ordering_api% will be replaced with the settings defined in the local.settings.json file inside the ProxyApp.

1
2
3
4
5
6
7
8
9
10
11
{
    "ConnectionStrings": {},
    "IsEncrypted": false,
    "Values": {
      "AZURE_FUNCTION_PROXY_DISABLE_LOCAL_CALL": true,
      "FUNCTIONS_WORKER_RUNTIME": "dotnet",
      "catalog_api": "http://localhost:1072/api",
      "basket_api": "http://localhost:1073/api",
      "ordering_api": "http://localhost:1074/api"
    
}

Notice that the parameters are defined inside the Values property not outside.

Azure Functions App Settings

Azure Functions have many settings that can affect your functions behavior. Here we set the AZURE_FUNCTION_PROXY_DISABLE_LOCAL_CALL to true so that the proxy will trigger new HTTP requests to the different Azure function apps rather than dispatching the requests to the same app, something that would result to 404 errors. We also set the FUNCTIONS_WORKER_RUNTIME setting that is relative to the language being used in our application.

In order to fully test the ProxyApp proxies, right click the solution, select Set Startup Projects.. and configure as follow:

Start debugging and all function apps will be hosted as configured in the Application Arguments. ProxyApp console logs will print all the available endpoints defined on its configuration.

Go ahead and test this unified API endpoint and confirm that requests are properly dispatched to the correct function apps. The ProxyApp contains a Postman collection named postman-samples to help you test the APIs. Open that file in Postman and test the Catalog, Basket and Ordering APIs using the unified endpoint exposed by the ProxyApp.

Proxies configuration in Microsoft Azure

After deploying all your function apps up on Azure you need to configure the proxies and application settings. First of all you need to check all the endpoints per function app (microservice). Keep in mind that in our example, all the functions require an access code to be added on the query string in order to be consumed. This is due to the AuthorizationLevel used on each function level.

1
2
3
4
5
6
[FunctionName("GetItems")]
public static async Task<IActionResult> Run(
    [HttpTrigger(AuthorizationLevel.Function, "get",
    Route = "items")] HttpRequest req,
    ILogger log, ExecutionContext context)
// code omitted

Let’s see how these functions looks like when deployed on Azure.

Each of the function app has a unique host and each function requires an access token.

If you try to get the URL for a specific function of an Azure Service App you will also see the required access token. Here is how the URL for the GetItems function looks like:

The code is different for each function so you need to get them all before setting the proxies on the root Proxy App function app.

After gathering all this information, open the Proxies menu item in the ProxyApp app.

Azure portal let’s you configure the proxies you have defined in the proxies.json file. Clicking on the catalog.items proxy opens a view where we can configure its behavior.

The picture shows that we need to add the code query string for this function plus to configure the catalog_api application setting for the App Service. Of course you could create an app setting parameter for the code as well and define it in the app settings. Unfortunately the UI won’t let you update the backend URL cause it requires that it starts with http or https

That’s ok though because you can use the Advanced editor as shown on the picture.

Next, open and configure the Application settings for the ProxyApp by adding all the parameters defined in the proxies:

Try the root endpoint of your app and confirm that all work as indented.


Mind that you can add or configure proxies to your functions whenever you want. Just open the Advanced editor, add a new proxies.json file, define your proxies and that’s it. No restart required.

That’s it we finished! I hope you have learned a lot about Azure Functions Proxies and how they can help you when building apps using Microservice architecture.

In case you find my blog’s content interesting, register your email to receive notifications of new posts and follow chsakell’s Blog on its Facebook or Twitter accounts.